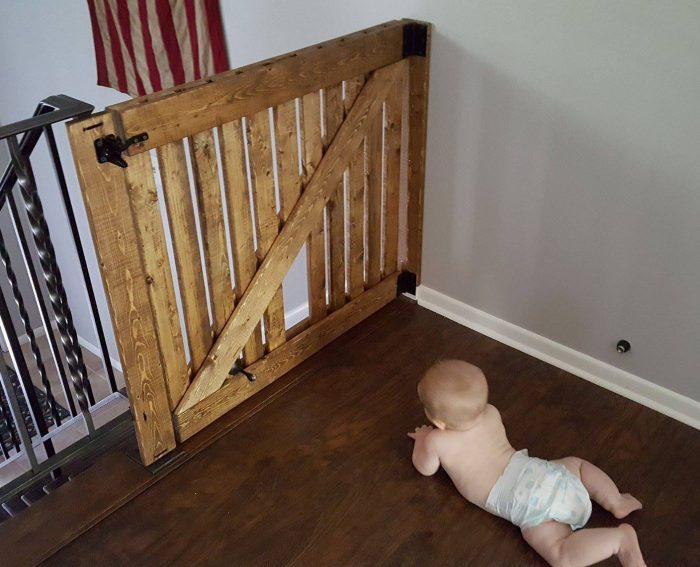
Ladies and gentlemen, we’ve got a crawler. Well, an army crawler. Six and a half months in and the baby proofing begins! We live in a 1969 split entry home so that means we have stairs and railings with large gaps. I knew we would need a railing guard and a gate at the top of our stairs which lead to our main living area. Since we’re hoping to have more than one child we figured these would be used for the next 4-5 years depending on how life goes. Plus, they can double as a dog door to keep them upstairs if needed. Since they’ll be a part of our home for so long and we have a rustic, cozy vibe going on, I decided it would be fun, practical, and attractive to make our own DIY barn door baby gate with pet door.
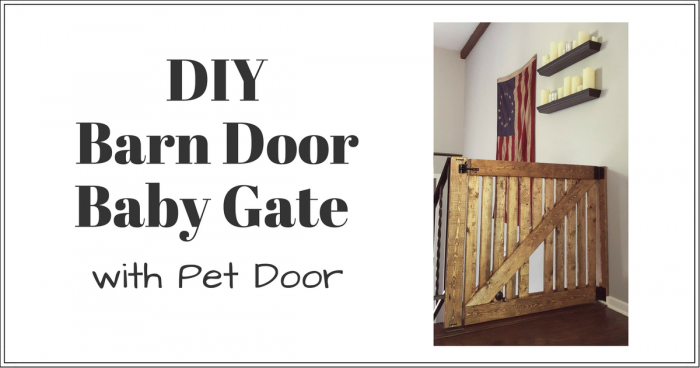
DIY Barn Door Baby Gate with Pet Door
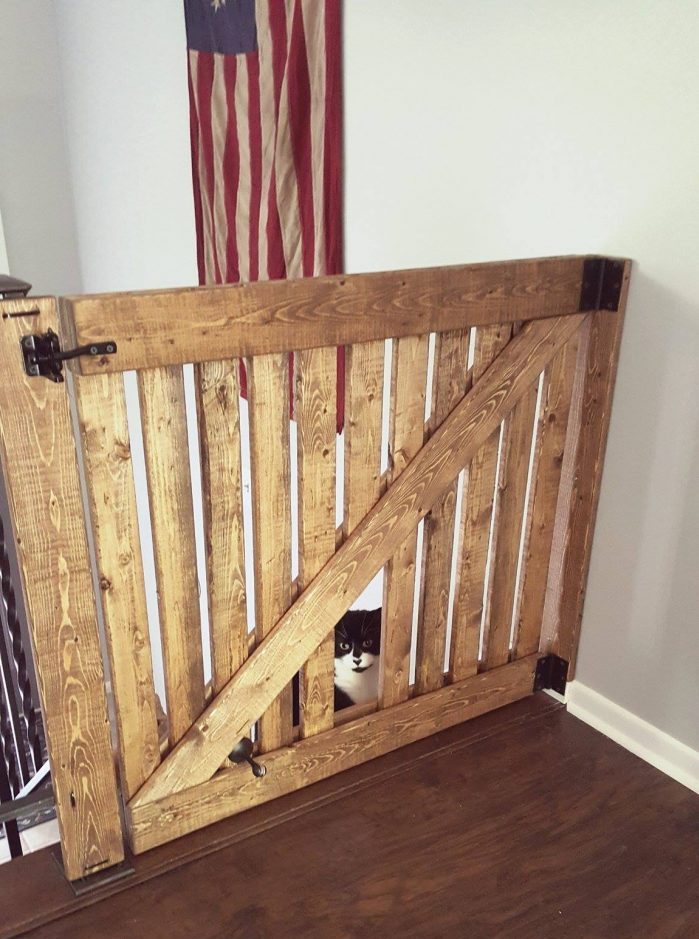
To make the house safe, I knew we would need a full railing guard as well as a baby gate for stairs which would completely block off the upper level from the lower. We have 2 cats that roam their castle, I mean house, freely. We feed them upstairs and their awesome litter box is downstairs so they need to be able to get around. This pretty much forced us to build a DIY stair gate with cat door so they could get downstairs as needed. In my DIY baby gate instructions, I’ll show you which step to skip if you don’t need a stair gate with cat door.
Design for DIY Baby Gate for Stairs
I went back and forth on designs but decided on one that would be semi see through and would allow light through as well. I like that our upstairs is mostly open and I didn’t want to block off the sight lines unnecessarily.
Guidelines for Safe Railing Spacing for Your DIY Baby Gate
You also need to keep in mind the guidelines for safe railing spacing. They recommend you have rail spacing at intervals less than two and three-eighths inches for children under the age of 2 and intervals of less than three and a half inches for children two years and over. These guidelines were the main factor in designing the look and functionality of the DIY baby gate.
We decided to use 4″x1″ boards for the frame and the diagonal cross bar to support the cat door opening. This also gave it a DIY barn door baby gate feel which I loved. We used 3″x1″ boards for the main slats but you could use larger or smaller if you like that look better. We used basic pine boards stained Early American, black zip ties to attach the wood frame to our existing railing, and black hardware to tie into the rest of our decor. All of these things can be customized to your design style.
Baby Stair Gate with Cat Door Instructions
Time to build: 2 hours
Skill Level: Easy to Moderate
Cost: ~ $35 (not including tools)
Tools Needed for DIY Wood Baby Gate
This list may look intimidating and expensive but they are must-have tools for DIY projects and they are all pretty affordable. The best part, once you have them you can make almost anything which is fun and saves you money in the end.
Tape Measure – Best to just get a long tape measure, you’ll need the length at some point.
Drill and Drill Bits – I got a small drill and bit set and driver set from my parents when I bought my first fixer-upper town home way back when I was 24 years old. It served me well but we registered for a heavier duty option when we got married and received this drill from my brother-in-law and sister-in-law. We absolutely love it. It’s hands down our favorite tool we own. This would be an amazing drill and driver set to have. It’s also actually really nice to have 2 drills for when one dies or when you’re doing a lot of drilling and screwing so you don’t need to change bits all the time.
Circular Saw – We got this circular saw as a house warming gift from my father-in-law and never realized how much we would use it. It’s our second most used tool in the garage and surprisingly they are under $50. Would have never guessed they were that cheap!
Safety Gear – Always wear safety glasses when working with wood and power tools. Also, a mask is a must when sanding!
Level – A mid length level is good to have, or a long level and a short level for various jobs.
*Palm Sander – I “got” a palm sander from my Dad. We were always borrowing it so he eventually told us to keep it and he’d borrow it from us if he ever needed it. Good man, my Dad. 😉 I’m also realizing now our garage work bench has been filled by our lovely family, haha! If you don’t have a palm sander you could use a sanding block and sand paper it will just take longer.
*Square – I had to convince my husband to buy a square and now he’s totally on board with how nice they are to have. Makes quick work of cut lines and angles.
*Bar Clamps – A set of bar clamps is another item I had to convince my husband to buy and another item he now loves 😉
*optional
DIY Baby Gate Supplies
The amount of wood, screws, and zip ties will depend on the size of your opening and what you’re attaching the gate to. Our gate is approximately 33″ x 33″ and we were attaching it to a metal railing on one side and drywall on the other.
1″x4″ pine boards – We needed four 8′ boards for our size gate. (actual size is .75″x3.5″)
1″x3″ pine boards – We needed six 8′ boards for our size gate. (actual size is .75″x2.5″)
1.5″ Screws – Choose a color that will blend in with your decor or stain/paint color. I chose black screws to match the hardware. We used about 40 screws.
Gate Latch – That’s it, just a gate latch 😉
2 Gate Hinges – We used 3″ hinges to fit on the 4″ boards (actual board width is 3.5″)
Heavy Duty Drywall Anchors – If you’re attaching to drywall you’ll need these. We used three 50lb drywall anchors just to be safe. Our gate is probably around 20lbs.
Heavy Duty Zip Ties – Choose zip ties in a color that will blend in with your wood stain/paint and home decor. We only used 3 zip ties but I got a larger pack of black zip ties to also use to attach our clear railing guard.
Stain or Paint – To match your decor. We used Rust-Oleum Early American Stain.
Foam Brush – I like foam brushes to apply stain.
Rag or Paper Towel – Used to wipe off stain after applying.
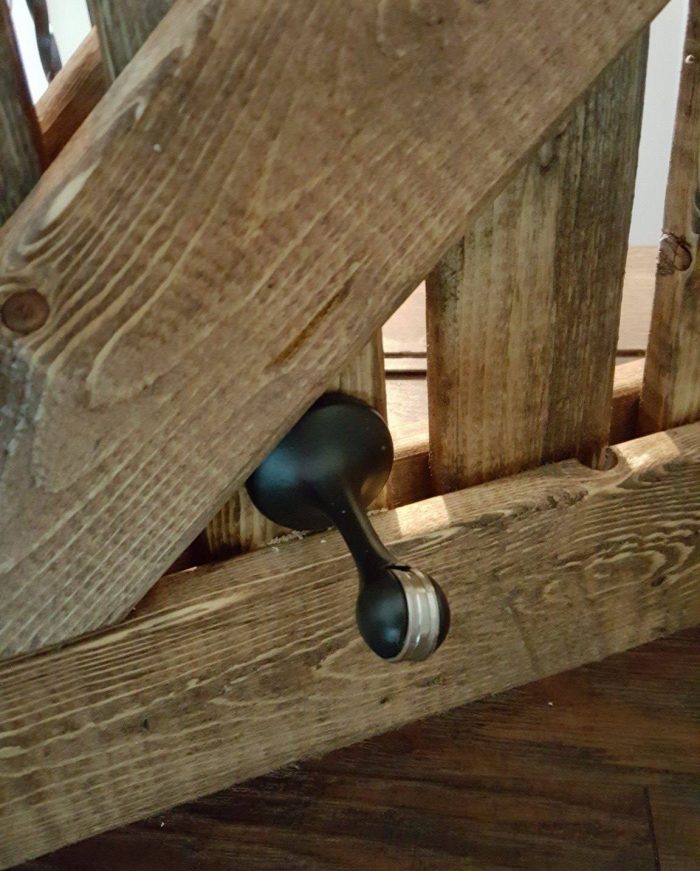
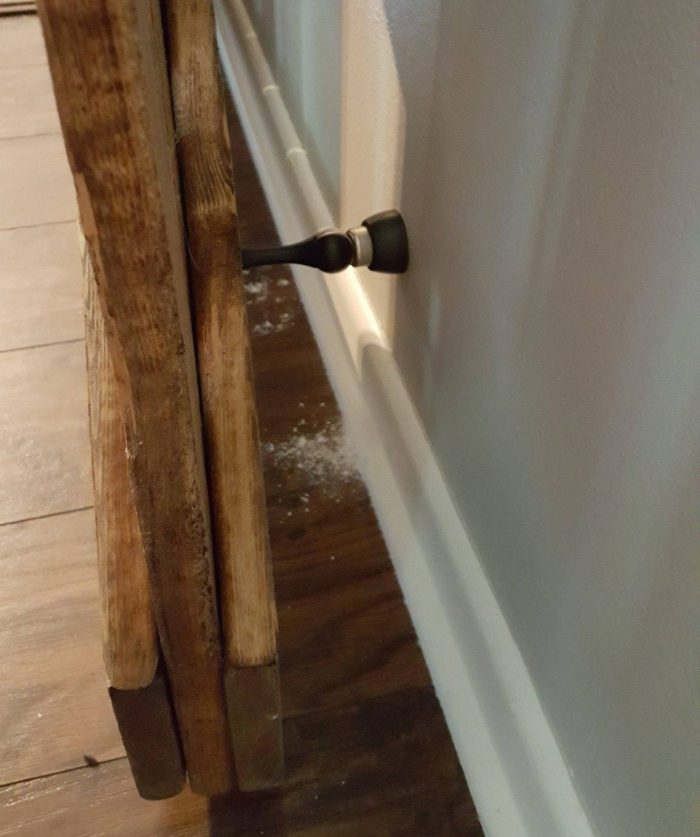
*Magnetic Door Stop – I wanted a magnetic door stop to hold the door open when not in use and I’m very glad to have it. It keeps the door out of the way rather than swinging freely.
*optional
DIY Barn Door Baby Gate Directions
Step 1 – Determine Size of Your DIY Baby Gate
Measure your space and determine how large your gate will need to be. Remember to include the outside frame boards for the hinges and latch. Standard height for railings and gates will be around 36″ (our older home has 33″ railings) so it’s best to determine how many 36″ lengths you need rather than total length since they may not equate out properly on 8′ length boards (which is the most common length for uncommon board sizes).
Example: We needed 11 – 1″x3″x33″ slats which equal about 31′ of board. If I’m getting 8′ boards and I need 33′ that would mean I need 4 boards BUT since the boards are 8 feet long and I need 3 foot sections I can only get 2 slats out of each 8 foot board which means I’ll have 8 – 3 foot sections and a lot of leftover 2 foot sections. That leaves me 3 slats short. Make sure to get enough lumber to accommodate the pieces you need.
**Factual Tip: Get 1 or 2 extra boards in each size in case you calculated wrong or for mistakes. You can always return them if they are uncut.
Step 2 – Determine Amount of Lumber Needed and Buy Supplies
Visit your local lumber store and determine what types of wood and what lengths they have in the sizes you need (1″x3″ and 1″x4″). Most places will have 8′ boards in the odd sizes. Standard boards like 2″x4″ will come in 8′, 10′, 12′ etc.. You’ll want the same type of wood for all sizes so it stains similarly but lengths can vary to fit your needs. Purchase all lumber and supplies (plus extras) from Amazon and your lumber store.
Step 3 – Cut Boards for Wood Baby Gate Door Frame
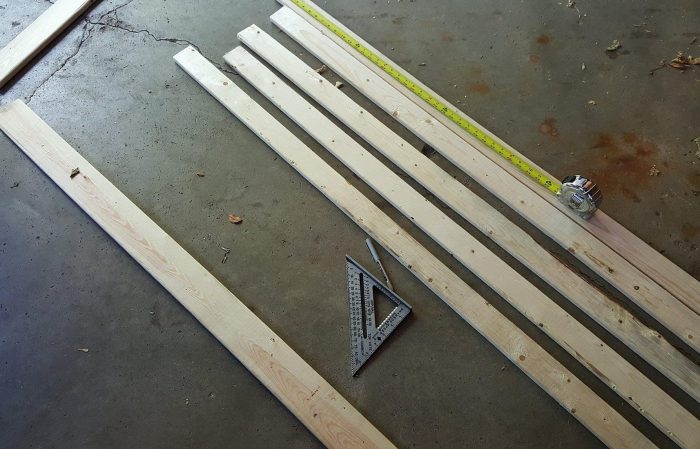
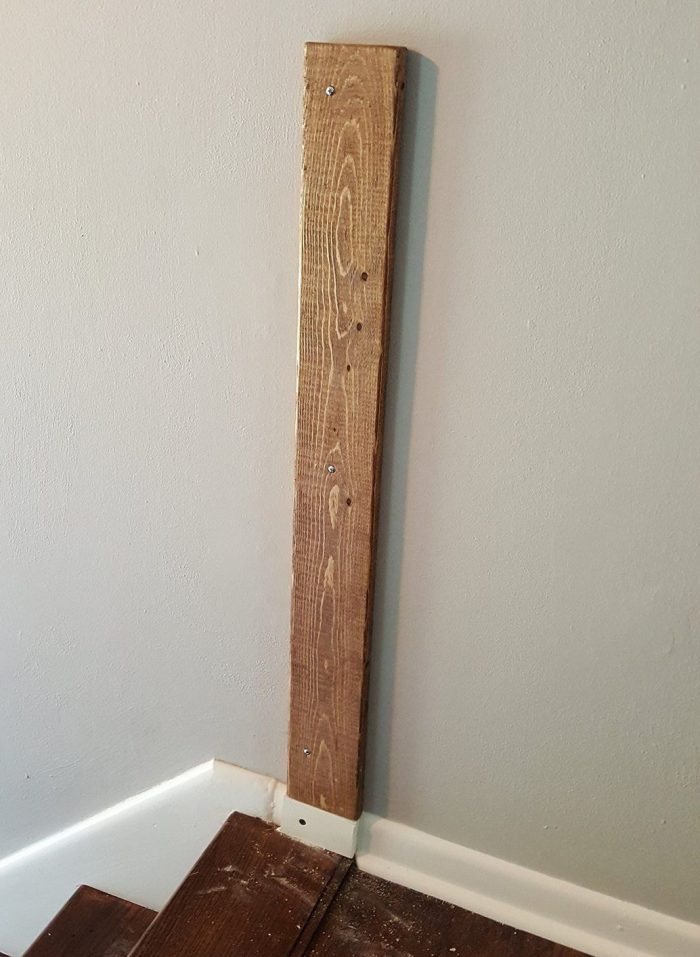
Measure the length of each side of your baby gate door frame. Ours are different lengths due to the base board on the wall side that we didn’t want to cut out (instead we used a small piece of baseboard overlaying the actual baseboard to bring it out to the same width as the 1″x3″ door frame board). Cut the pieces to length using your circular saw.
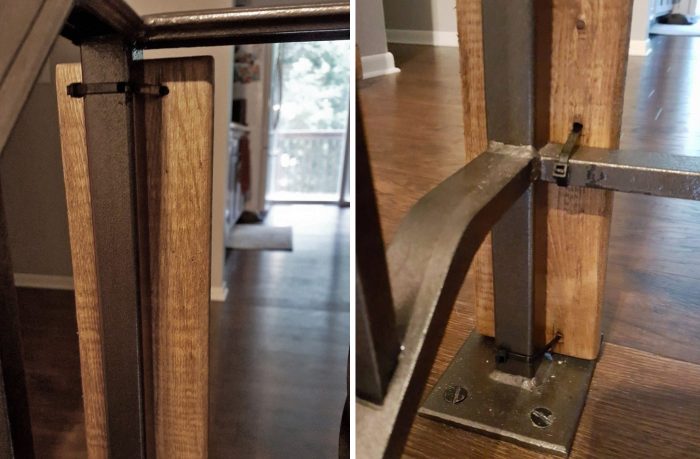
If you are attaching your door frame to an existing banister, determine how it will be attached. Our railings are metal and smaller than the wood we’re using so we needed to drill holes in the wood board so the zip ties could snuggly hold the board around the rail. If your railing and the board are similar sizes you can just wrap the zip ties around the whole board and banister in a few places (make sure to account for where your latch will be and don’t put a zip tie in the way).
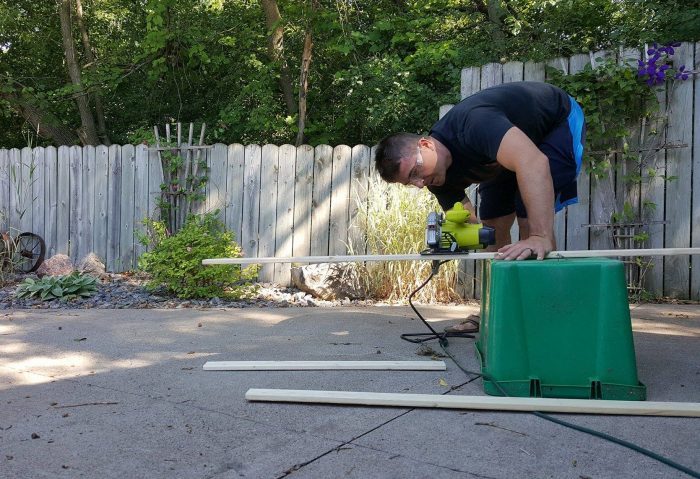
Don’t you just love our “saw horses”?! Recycling old recycle bins. It doesn’t get any more green than that 😉 For safety reasons I recommend ACTUAL saw horses for your projects.
Step 4 – Measure Opening for Baby Gate
Hold these boards in place and measure the exact width between door frame for accurate door size, taking hinges and latch into account. Our opening is 34.5″ and our actual door size is 33.5″ to accommodate the hinges and to allow the gate to close without rubbing. Your latch should have about 1″ of extra length to accommodate a slight gap.
Step 5 – Cut Main Boards for Your Wood Baby Gate
Measure and cut four of the 1″x4″ boards to the width of your baby gate (for us, 33.5″) for the top and bottom of the DIY barn door baby gate.
**Factual Tip: use a tape measure to determine proper length and then use a square to get a perfectly straight cut line.
Measure and cut slats to the appropriate height for your DIY barn door baby gate taking into consideration you don’t want it resting right on the floor (for us, 32″ which leaves .5″ gap between the floor and bottom of the gate). We started with 10 slats and decided we needed 11 to have proper spacing for our gate width.
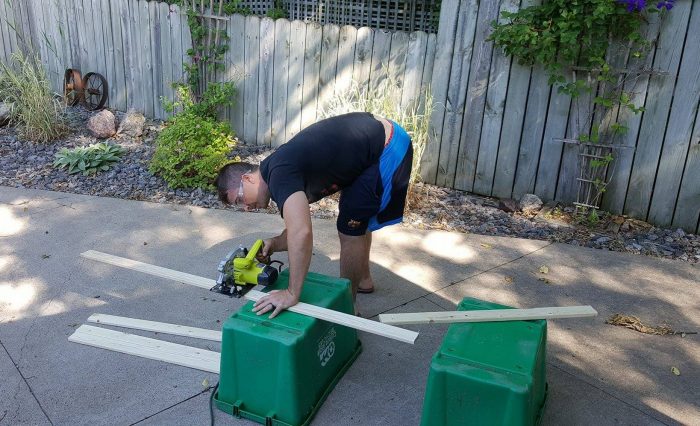
Don’t you just love our “saw horses”?! Recycling old recycle bins. It doesn’t get any more green than that 😉 For safety reasons I recommend ACTUAL saw horses for your projects.
Step 6 – Determine Spacing for Slats and Pet Door Opening
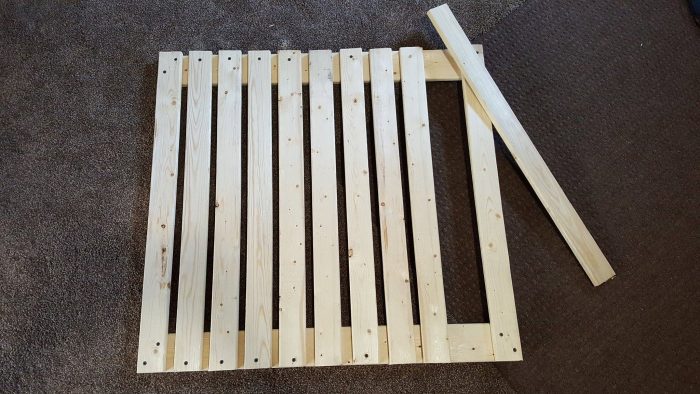
Lay out a top and bottom board. Lay the slats on top and determine proper spacing for your needs. Our slats have a .75″ space between them. If you need a stair gate with cat door, make sure spacing will be wide enough for your pet but not so wide it’s dangerous for the baby. We determined our slat spacing after determining how wide we needed the pet door. Our cat is very large so our baby gate pet door needed to be about 4″ wide. To make the pet door, we cut out 1 slat so we were left with .75″ gap + 2.5″ board + .75″ gap = 4″.
**Factual Tip: We made sure the 4″ spacing would work by opening our sliding glass door to our porch 4″ and having our cat walk through.
Step 7 – Attach Slats to Top and Bottom Board
Now that you have determined your spacing, one slat at a time starting with slats on each end, drill a pilot hole in top and bottom of the slat and screw the slat to the top and bottom boards of the baby gate. Do this for each slat except the middle one if you are making a stair gate with cat door.
*NOTE: If you do not need a stair gate with cat door, simply attach the middle slat as you did the others and skip step 10.
Step 8 – Cut Angled Boards for You DIY Barn Door Baby Gate
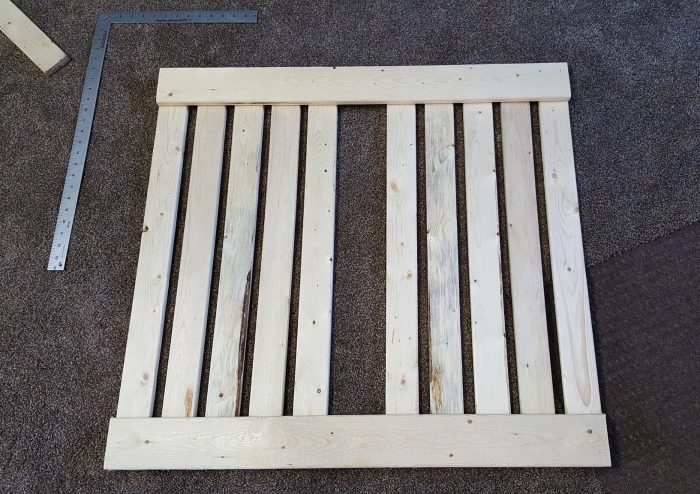
Lay a 1″x4″ board corner to corner across the gate. Mark the left and right side with a small hash where the cross board touches the top board. Connect the two hash marks with a straight edge to get your angled cut line. Cut the angle and fit it to the DIY barn door baby gate.
**Factual Tip: Use your palm sander to easily adjust the angle and get the perfect fit. (We are not the best at cutting angles… 😉 )
Fit the angled cut to the top of the gate and then mark and cut the bottom angle in the same manner.
Once you have a good fit, use this board as a template to cut your second cross board.
Step 9 – Attach Front Cross Board
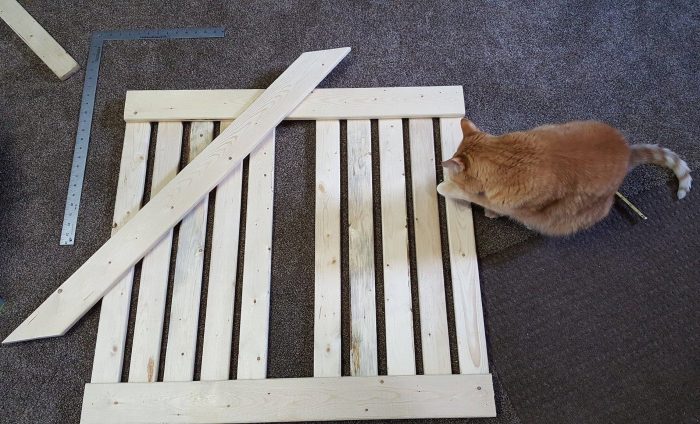
With gate face down on the floor, lay the cross board in place under the slats. Use Clamps to keep the cross board snugly in place. Drill pilot holes in both ends and screw board to end slats.
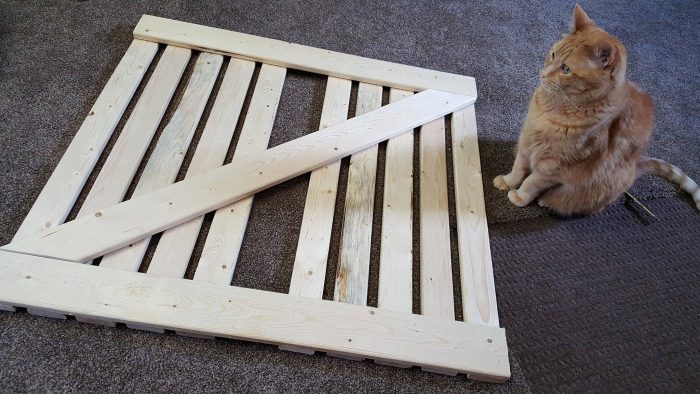
Step 10 – Cut and Attach Remaining Slat if You Need a Stair Gate with Cat Door
Lay the remaining middle slat in place and mark a cut line following the angle of the cross board. Cut the middle slat to length and attach in the same manner as the others.
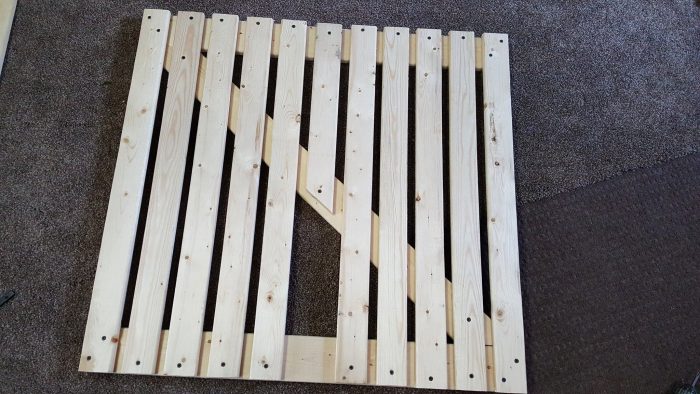
Step 11 – Sand Cut Edges of Wood Baby Gate and Remaining Pieces
At this point, you should have your gate partially finished, plus cut pieces for the top, bottom, and middle of the back of the gate, and the 2 frame boards. Lightly sand each of the cut edges on the gate and remaining cut boards.
Step 12 – Stain (or Paint) DIY Baby Gate and Remaining Pieces
It’s easier to stain pieces that aren’t yet sandwiched together so before finishing the gate, stain each of the pieces using a foam brush and a rag to wipe off any excess. Make sure to get in the cracks and stain all sides. Allow it to dry completely.
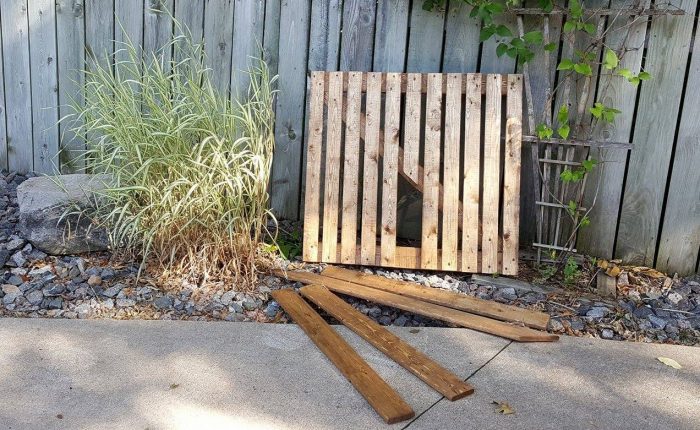
Step 13 – Attach Back Pieces to Wood Baby Gate
Attach the top, and bottom horizontal boards to the back of the gate by drilling pilot holes on both ends and in the middle and then screwing in place.
Attach the cross board in the same manner.
Step 14 – Attach Hinges to Baby Gate
Mark hinge holes and drill pilot holes. Attach each hinge to the gate using appropriately sized screws.
Step 15 – Install Door Frame Boards
Attach frame boards to railing banister and/or wall. If you’re attaching to a banister and wall, attach banister frame board first, then use the baby gate door to determine a straight line across the opening to find proper placement for the door frame board on the wall. Use a level to make sure the boards are vertical on the wall/railing.
Avoiding your hinge location, drill 3 pilot holes in the wall door frame board (top, middle, bottom) making sure to puncture drywall slightly. Move board and at each mark in the wall, install heavy duty drywall anchors to support the weight of the door. Attach the wall board with anchor screws.
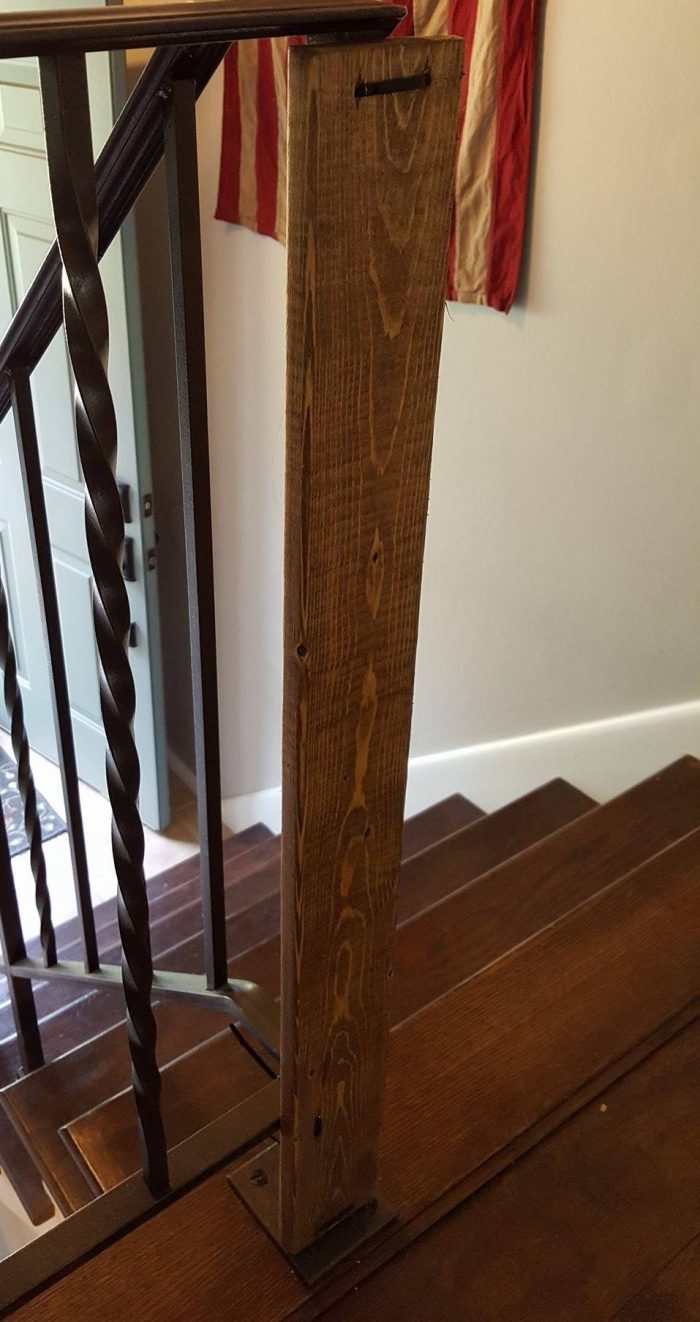
Step 16 – Attach Baby Gate Hinges to Frame
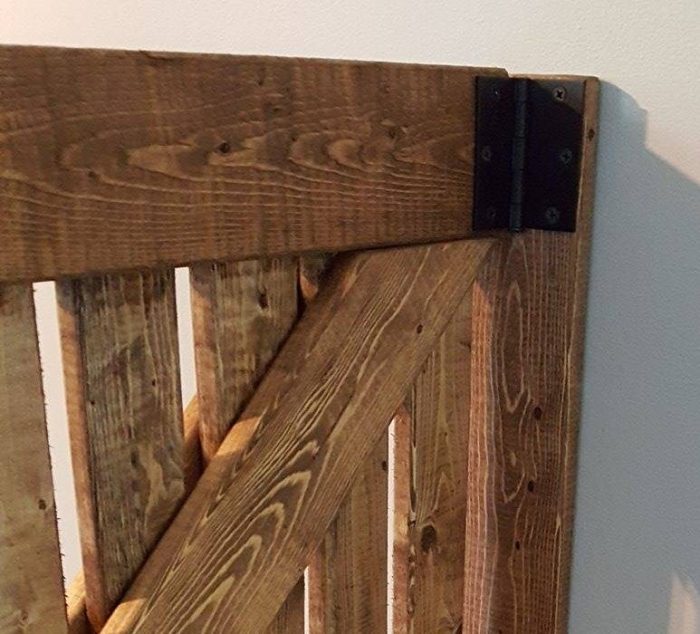
Hold your DIY barn door baby gate hinges up to the door frame. Mark hinge holes. Drill pilot holes then attach hinges with appropriate screws. We choose to use longer screws than the ones provided with the hinges. Make sure gate swings open and closed easily.
Step 17 – Attach Latch to Frame and Your DIY Barn Door Baby Gate
Hold both pieces of the latch up to the closed DIY baby gate door and frame. Mark the screw locations for the catch portion of the latch. Drill Pilot holes then attach catch with screws.
With the Latch arm in the catch mark the placement on the baby gate door. Drill Pilot holes then attach the latch arm with screws.
Make sure the DIY barn door baby gate latch opens and closes easily.

OMG you’re almost done!
Step 18 – Add Magnetic Door Stop
Not mandatory but it does make this DIY barn door baby gate so much better! Determine the best location on your baby gate for your magnetic door stop and attach it to the door and wall with the directions provided on your specific style door stop.
Mark sure the 2 pieces line up and hold the gate open as intended.
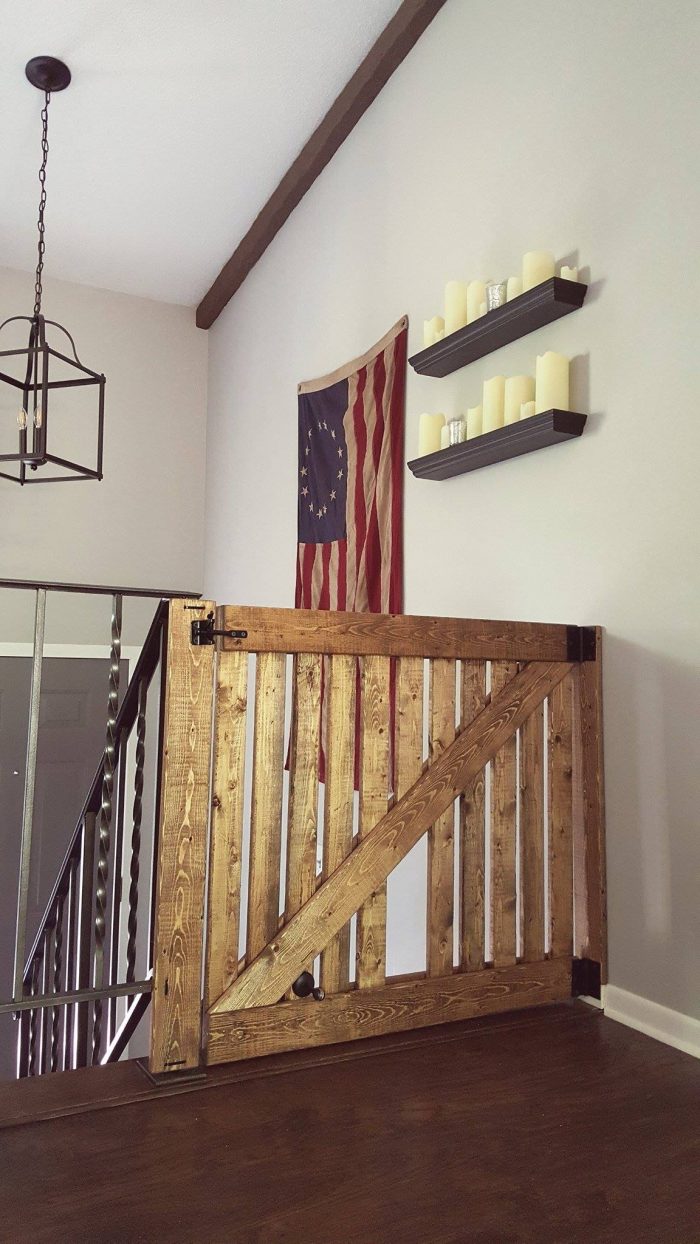
Completed DIY Barn Door Baby Gate with Pet Door
DONE!! Look at that masterpiece! And it wasn’t so hard, was it?!
Probably the best DIY barn door baby gate you’ve ever seen. 😉 Doesn’t it feel amazing to make something so lovely with your hands? I just love it! It’s a bit of an addicting feeling of accomplishment. Well done!
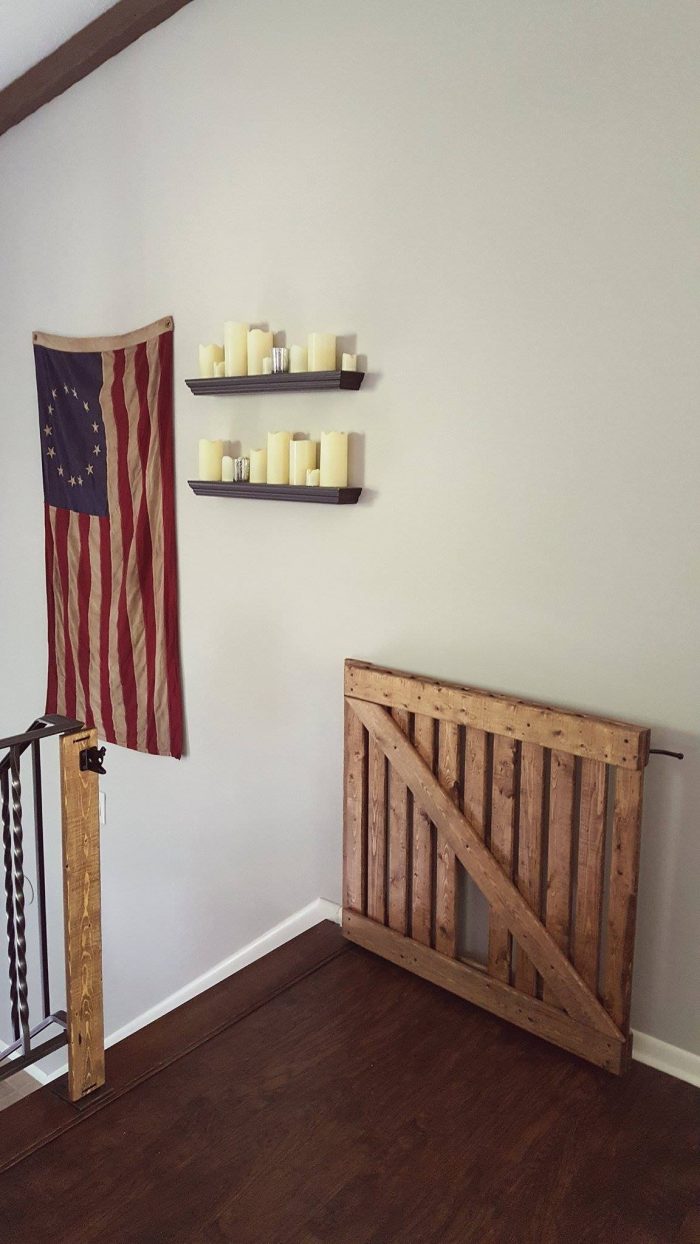
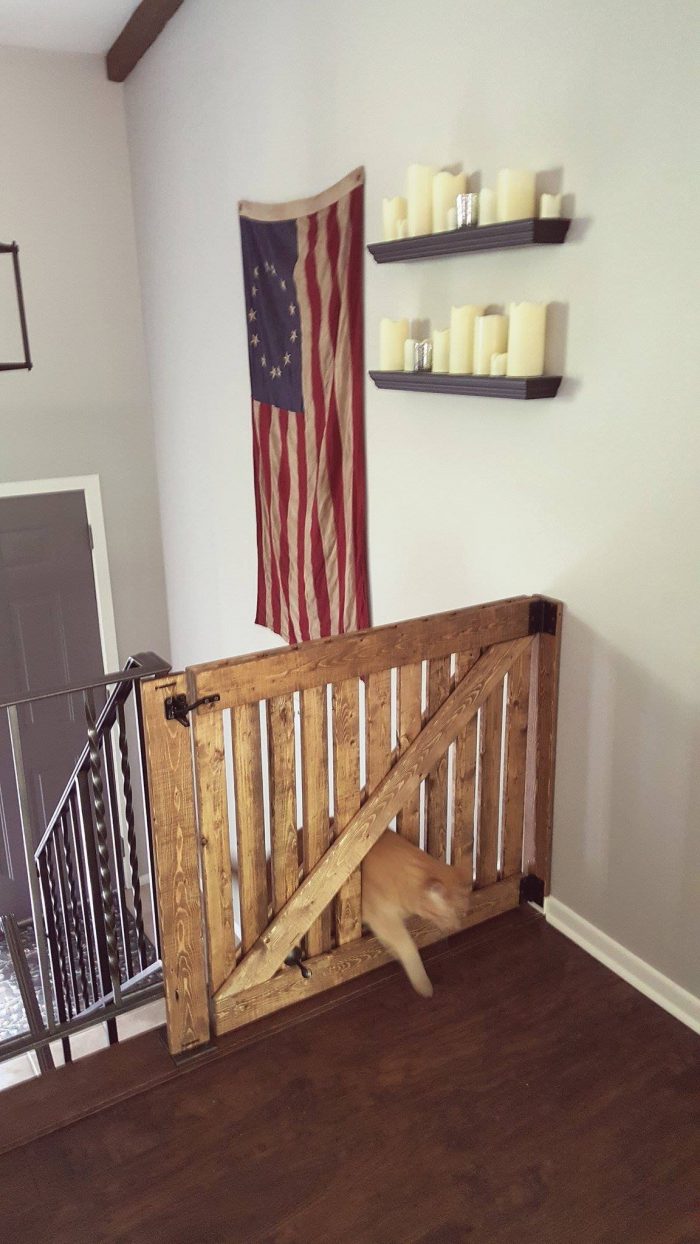
Now that you have that big DIY project under your belt, check out my cheap and Easy DIY Growth Chart Wood Ruler for Kids: Under $10!
How did your DIY Baby Gate turn out?
Let me know in the comments below! Pictures of your finished DIY wood baby gate are an awesome bonus!
Until Next Time,
XO,
Meg


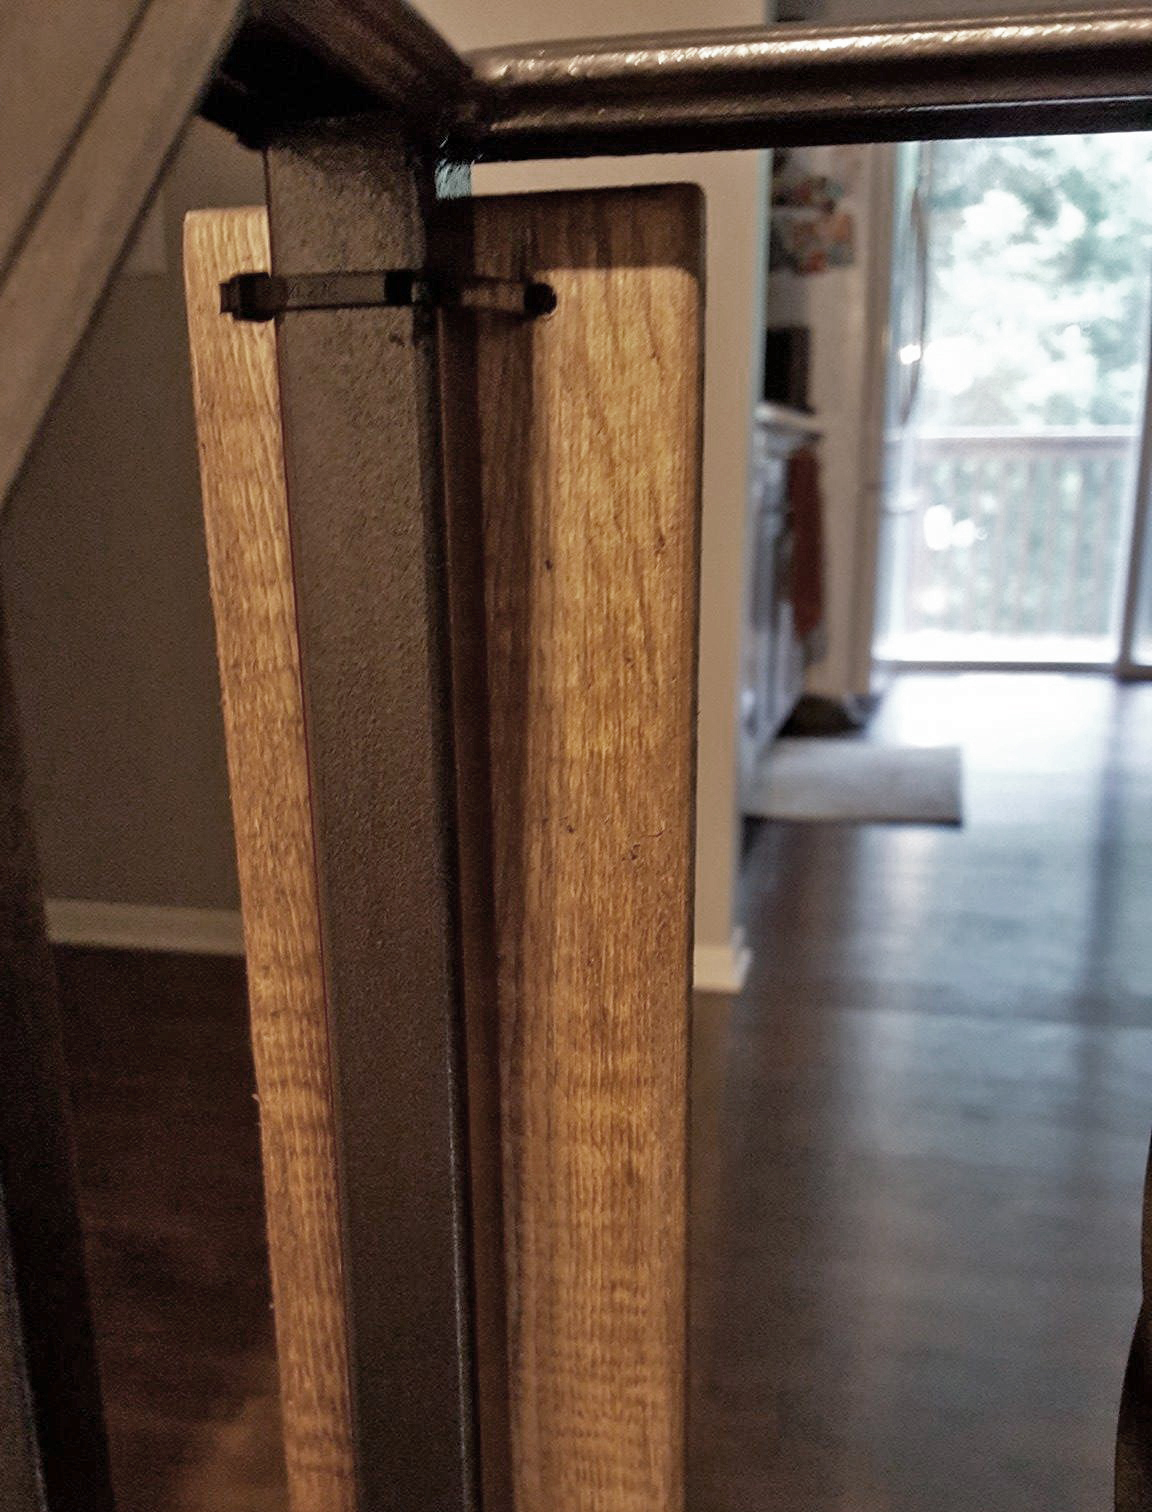
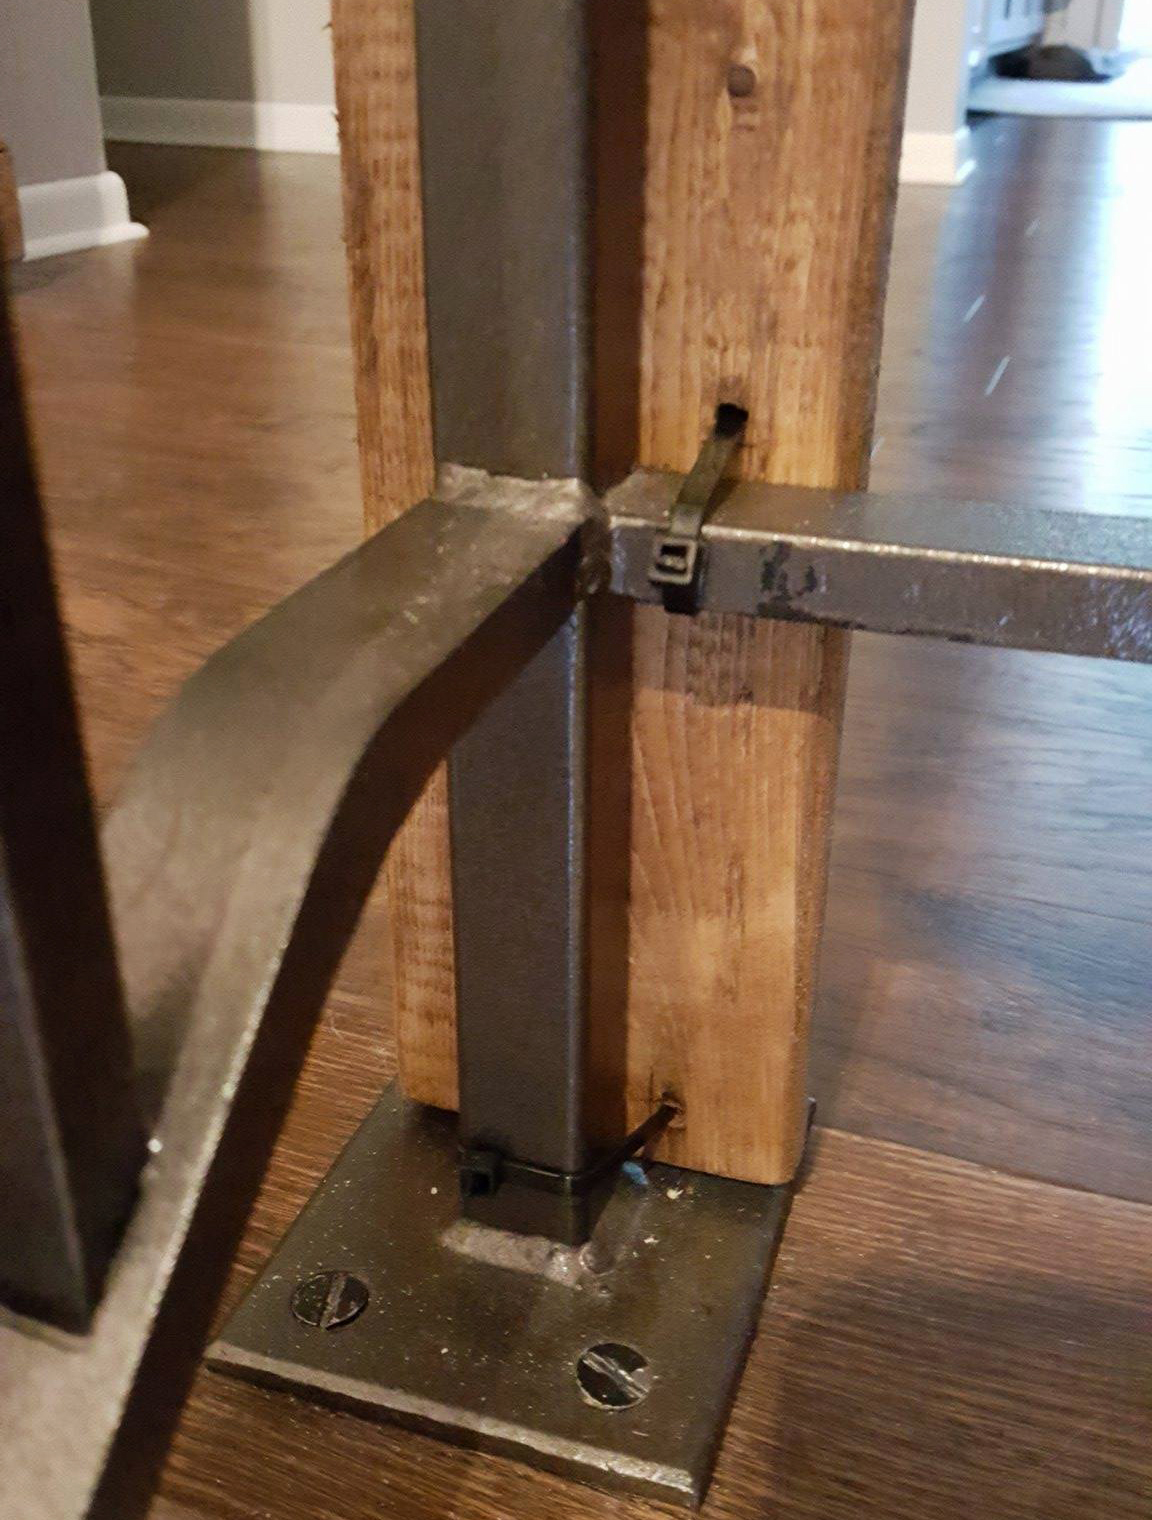
Can I see a pic from the other side of rod iron railing? How did you attach to that?
Hi, Jamie! For the door frame attached to the railing we used black zip ties through holes we drilled in the board. I have one on the top and bottom of the end vertical rail and one on the horizontal rail to prevent it from wiggling back and forth.
Thanks for stopping by!
Meg
Really Appreciate this update, is there any way I can receive an update sent in an email when you publish a fresh article?
Hi, Darryl! Thanks for checking out my DIY baby gate post! You can receive updates when new posts go live by subscribing to our email newsletter. I can sign you up and for future reference, anyone can sign up by entering their email in the subscribe field on the right side of the blog.
Hope you enjoy my future posts!
Meg
Hey Meg! So I totally used your instructions and came up with our doggie gate! Overall, it took us less than a few hours and less than $20 to make. We had to change a few things since our stairs are a little different than yours. But it turned out awesome! Thank you!
P. S. I can’t figure out how to post pics, otherwise I would
Hey Vanessa! That’s awesome! So glad the instructions worked out for you. And only $20, that’s so much cheaper than buying an ugly plastic one!! Nice work!
XO,
Meg
Just for future reference your load-bearing brace should start at the bottom of the hinge side, nice gate otherwise!