Man do toys accumulate! Over the winter, we were using our sons new Sand and Water Table to hold all his small toys and Duplo Legos. It was a great way to allow him to play with the table inside while also organizing and cleaning up his toys. Well, then summer rolled around and we actually wanted to use the sand and water table outside for what it’s intended. This left our rec. room looking like a tornado hit and a toy box jumped to the top of the to-buy list really fast. Rather than buy new particle board furniture, I like to repurpose and reuse quality pieces as much as possible. That’s where the idea for an antique steamer trunk turned DIY toy box treasure chest was born!
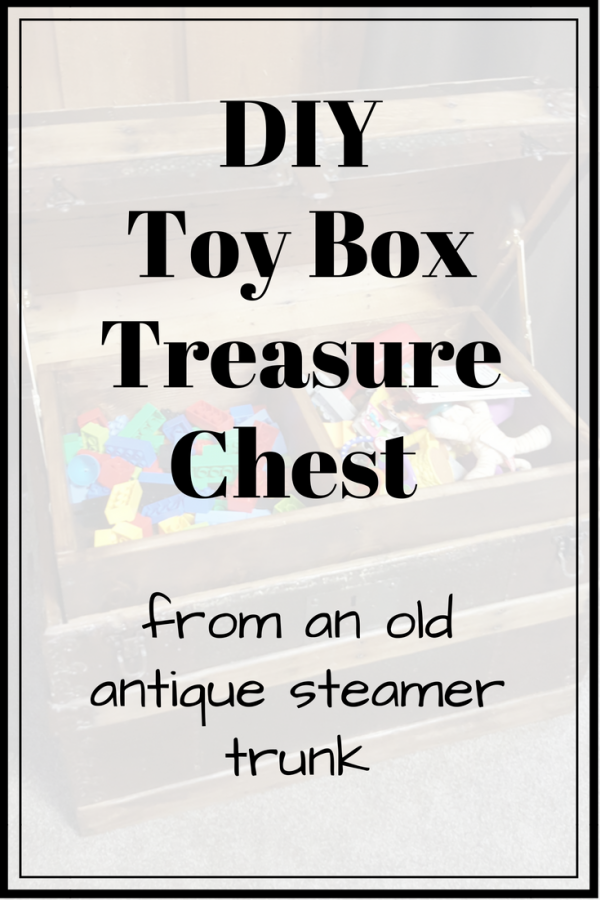
DIY Toy Box Treasure Chest from Antique Steamer Trunk
I didn’t have a steamer trunk so the search was on. I checked Craigslist and Facebook Marketplace regularly and found several in the $30-$50 range that looked like they would work but they were almost too nice for want I wanted. The purpose of this was to be a TOY BOX, not to restore an antique. I wanted something that was begging for a second life that I wouldn’t be worried about getting dinged up.
That’s when I found 2 on Facebook from the same seller just down the road from my childhood home. One was an antique steamer trunk full of character in VERY rough shape for $10, the other was a vintage suitcase style trunk with less character but in good shape for $20.
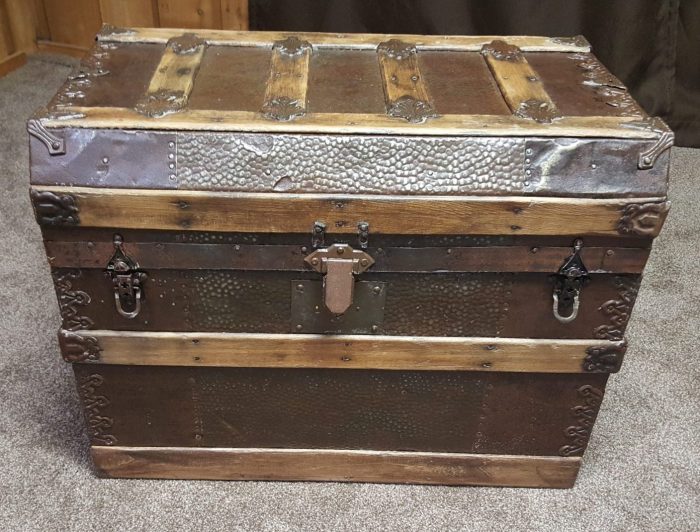
These are the listing photos for the one we went with. Yes, we’re probably a little crazy…
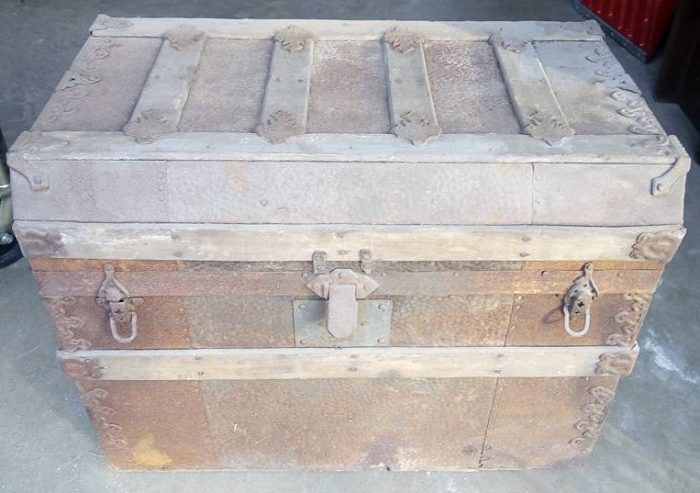
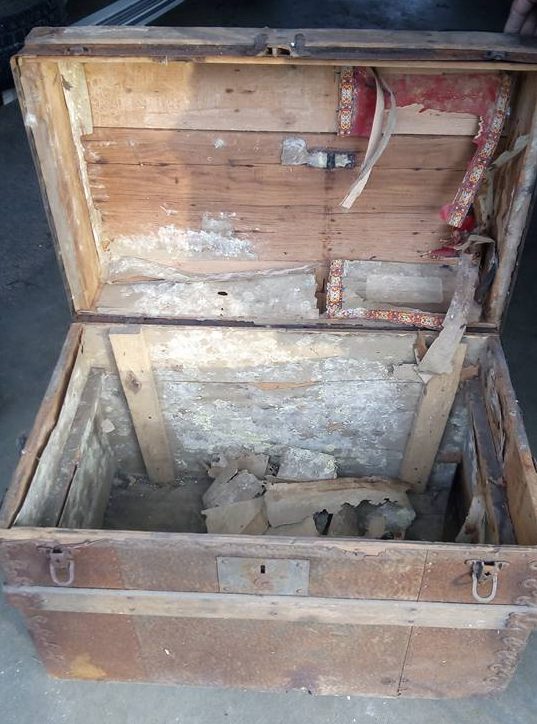
We checked out both and decided on the $10 steamer trunk for the DIY toy box treasure chest. It was on its last leg and we weren’t even sure we could save it but it was also one I wouldn’t feel bad about turning into a toy box and not restoring.
When we picked it up, the metal was so rusted it was crumbling and the wood was dried out and splintering. Again, we’re a little crazy 😉 We initially thought we would sand the whole thing down and paint it a thick coat of black matte paint to seal everything up.
Well, as projects often go, plans changed.
Turning an antique steamer trunk into a DIY Treasure Chest Toy Box
1) How to Clean Up an Antique Steamer Trunk
The first step in making this trunk even safe to bring in the house was to get rid of all the flaking rust and splinters. I used a palm sander and a wire brush to take off all the loose rust and dirt. It also smoothed the surface enough to make it paintable (because remember, I thought I was painting it solid matte black).
I also had to clean out the inside which was covered in the original, peeling, and rotting decorative paper liner and cobwebs. First, I removed all the old paper and sanded any sharp edges or just generally “icky” spots inside. I also sprayed the whole inside with a bleach spray just for good measure.
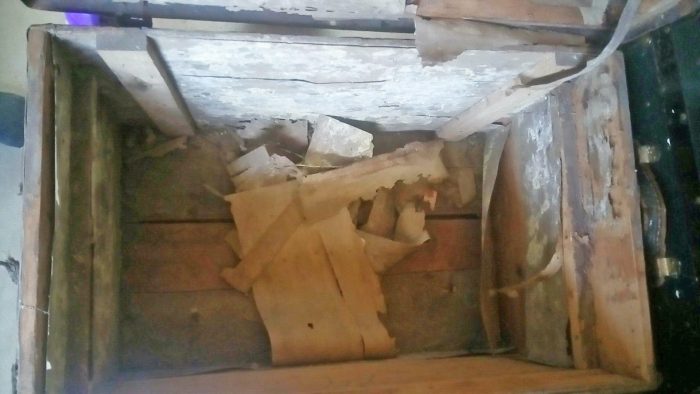
Then, I rinsed the whole thing down with the hose and scrubbed the dirt and dust off with a utility scrub brush. I let it dry in the sun for several hours which also helps with any residual smells and stains.
The moment where my painting plans changed:
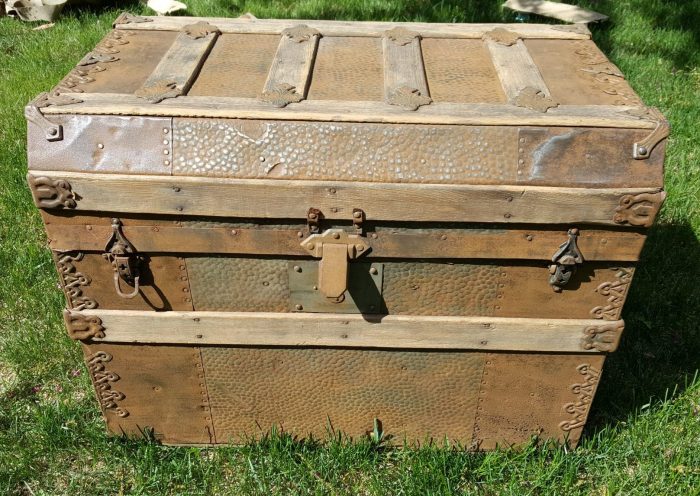
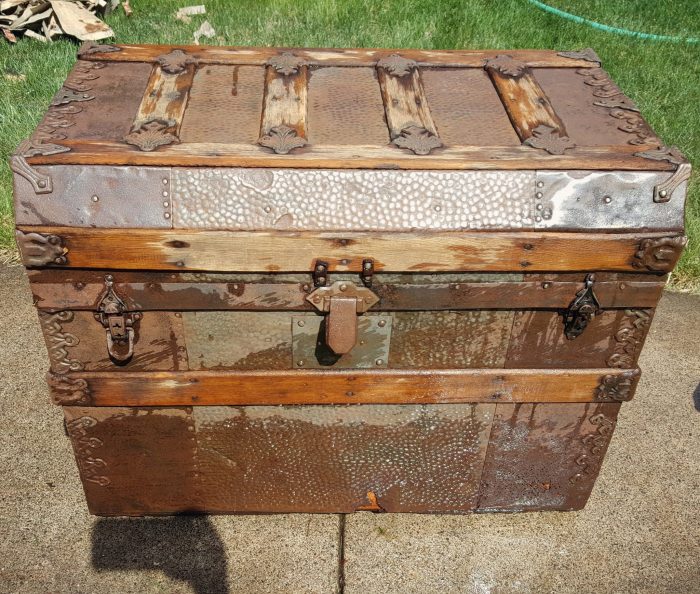
If you follow me on Facebook (if not you can do so here: Factual Fairytale) you probably know what happened next. After rinsing the decades of grime off and wetting the dried out metal and wood, I revealed a really beautiful patina on the metal and a perfect you-can’t-get-that-with-a-stain wood tone that I couldn’t imagine painting. Initially, I wanted to use the paint to seal up all the metal edges and we already have a lot of wood in our rec. room so I was torn on what to do. So, naturally, I asked my lovely Facebook friends! After a lot of responses, it was clear (and nearly unanimous), put a clear coat on and embrace the age of the antique steamer trunk. So that was the plan!
2) Rehabbing a Rusted Antique Steamer Trunk
Since I was making a DIY toy box treasure chest, I needed this to be safe and sturdy. There were a few places the metal had been crushed and bent along the top edge. These needed to be bent back with pliers and nailed back in place to it was flat.
There were also a couple places along the bottom that the metal was rusting away (see photo above). I purchased a thin piece of wood to match the slats that were already on the Steamer Trunk and stained it (by mixing several colors I already had) to get the closest match possible to the aged wood. I nailed this at the bottom of the front to cover the spots where the metal had rusted away (see photo in step 3).
If your trunk needs any structural supports (mine already had some on the back), this would be the time to add those.
3) How to Seal a Steamer Trunk for a DIY Toy Box Treasure Chest
With the wood and metal fixed up, it was time to seal the whole thing, inside and out. This stops further rusting and aging. I had planned to use a Rust-Oleum spray on sealant but decided to try the brush on Spar Urethane in a small section on the back to see how that worked.
The Spar Urethane ended up providing a much thicker coat than the Rustoleum would have, thus sealing all the metal edges and remaining rough spots in the wood. 2-3 coats ended up giving the whole thing a really thick, smooth finish, perfect for a toy box.
*I do not recommend using Spar Urethane if you are trying to restore an Antique Steamer Trunk. The goal of this project was to make a safe and functional DIY toy box treasure chest, not bring the steamer trunk back to its original glory. You can see slight white spots where the Spar-urethane went on thick in the metal details. This doesn’t bother me in the least. If restoring, use thin coats of a spray on rust covering product.
The Spar Urethane sealant didn’t make the trunk quite as rich and glorious as the water did (see last photo in step 1). You might need to use a penetrating sealer/restorer on the wood before the Spar-urethane to achieve that look.
4) Safety Hinges for DIY Treasure Chest Toy Box
This was one of the toughest parts for us. Determining how we were going to stop the lid from falling open or slamming shut on tiny fingers. After a lot of trial and error with cheap products, I decided to look into soft closing hinges. They’re a bit pricey and a lot of them won’t work with an antique steam trunk because of the deep, curved lid.
I ended up making a trip to Menards and buying a couple options to try. I found the locking hinges to work the best for our trunk but I would recommend trying a few to see what works best for yours.
We only needed 1 for the size and weight of the lid but used 2 just in case he managed to collapse one of them. It’s probably overkill since you have to really pull but better safe than sorry. Plus, these also happen to be the most economical option which worked out nicely.
5) Building an Organizer for a DIY Toy Box Treasure Chest
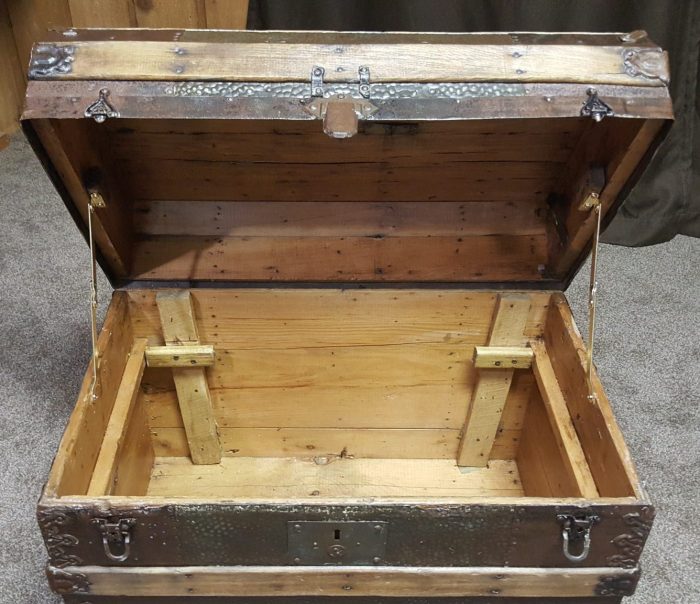
Last, I built a 2 compartment box to utilize the extra space in the lid. This is also the perfect place to store Duplo Legos, foam blocks, and small toys, animals, and people.
Most steamer trunks have braces on the side for the top compartments they once had. I also added small braces to the back wall for extra support, you can see them in the photo above. Our braces are about 2″ down and the lid is 3.5″ tall at the shortest spot. We used 1×6 boards for the sides and middle divider, which are actually 5.25″ wide and .75″ thick. I always find this silly, why not just call lumber the dimensions they actually are?! Anyway, for the bottom, we used 1×6 and 1×3 to get the size we needed. You’ll have to adjust this based on the size of your antique trunk.
I made a super basic box to fit (remember to take the hinges into consideration) then sanded, stained, and sealed it.
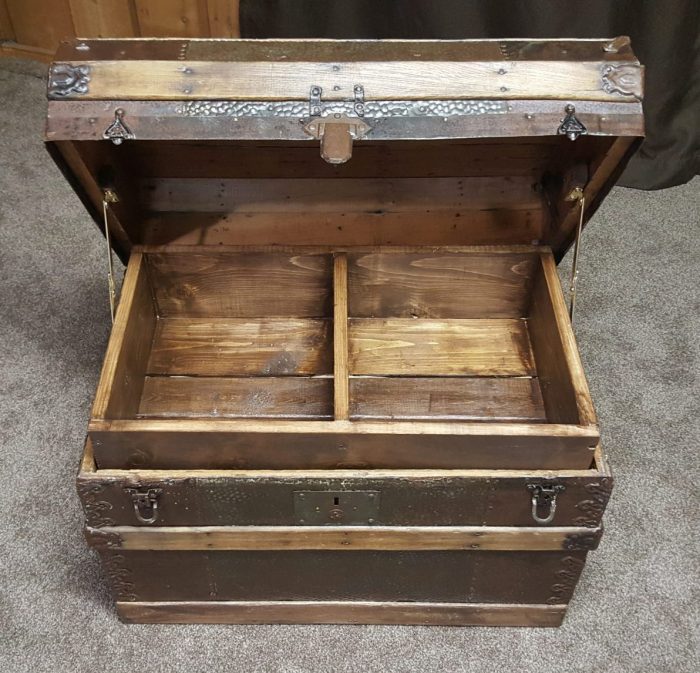
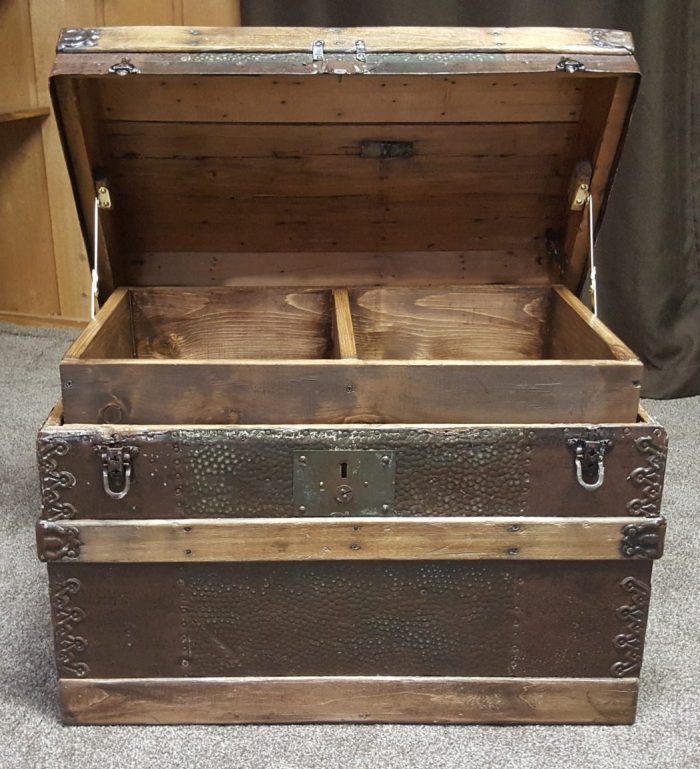
TADA! Your DIY Toy Box Treasure Chest from an Antique Steamer Trunk is complete!
As I said, we use the top for legos, blocks, and small toys. In the bottom, we store our “rotation toys” because our 1 year old can’t lift the box out. It’s so easy to keep things picked up and the steamer trunk looks a heck of a lot nicer than a bunch of plastic totes! Plus, as our son grows it will be a really fun “Treasure Chest” toy box for all his favorite things!
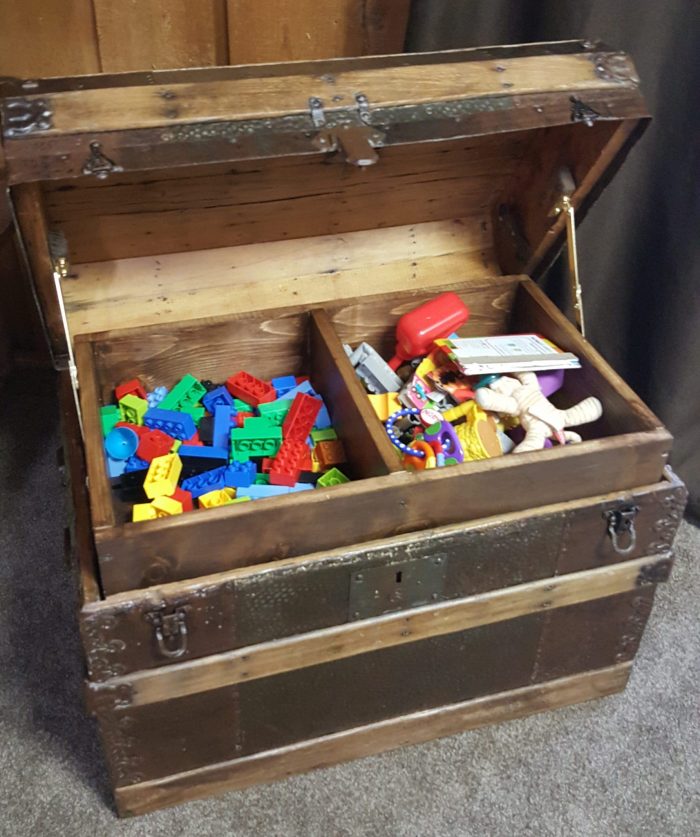
So what do you think of our treasure chest toy box? Like the clear coat patina look?
Share your thoughts in the comments below!
Until Next Time,
XO,
Meg


What a fabulous idea! Your treasure chest looks awesome! Thank you for sharing!
Thank you! And thanks for stopping by, Sarah!
XO,
Meg