We recently had a {planned} visit from the original owners of our 1969 home. It was one of those things where I was a little hesitant when they asked to come by but so glad they did. It turns out, the house and finishes were almost all original when we bought it 4 years ago. It’s so crazy to me that nothing had been done to update it in 45 years. Well, that changed when we got a hold of it. We’re DIYers. We love projects and everything that comes with them. Our latest project is our DIY barnwood wall we built from new wood made to look old and weathered. Here’s the story of our “red room” and how to age wood for your own wood accent wall DIY project.
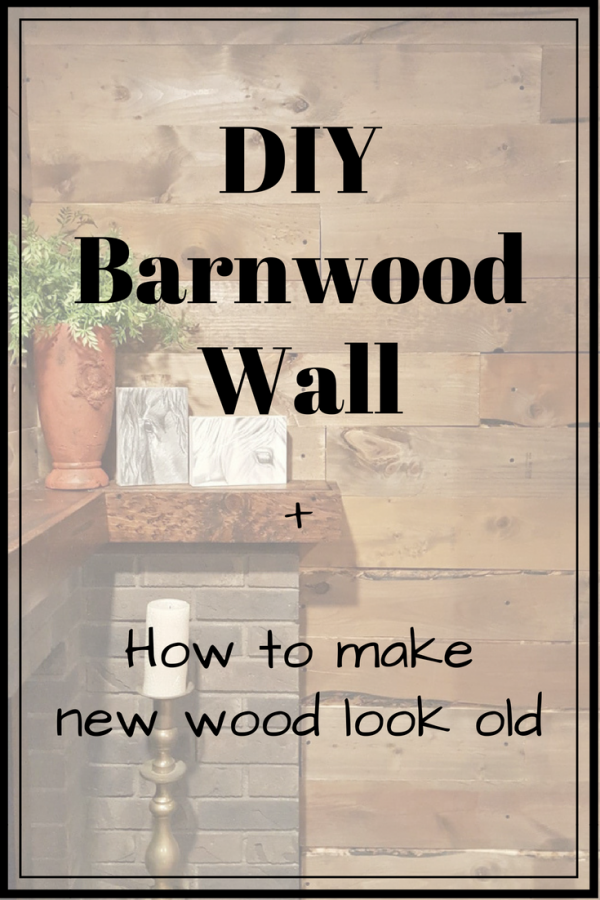
DIY Barnwood Wall + How to Age Wood
The story of our “red room”
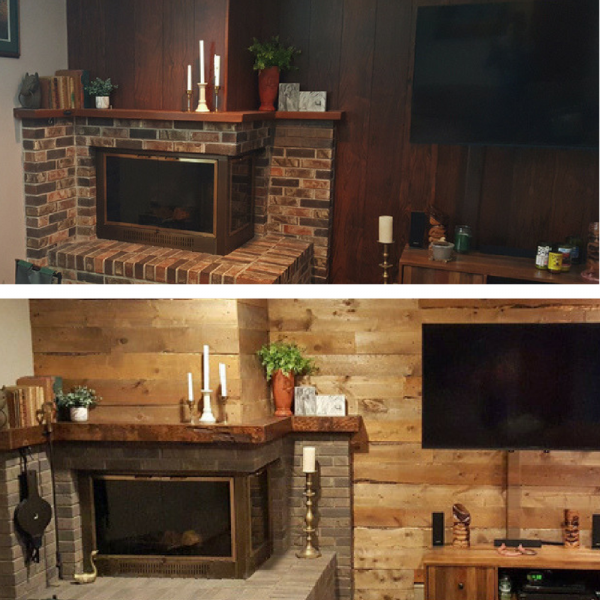
The house has been almost completely renovated in the 4 years we’ve been here. The last room to update was what we called “the red room.” It’s our downstairs living room that was clad in burgundy and black faux wood paneling, a pink/red/grey brick fireplace, bright red carpet (original and in shockingly great condition!), and roman shade to match.
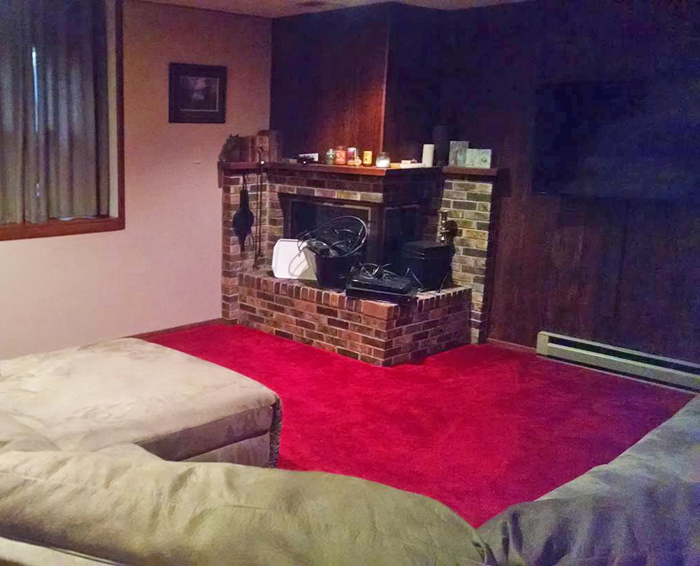
(I apologize for the horrible quality of this photo – it’s the only photo I have of the bright red carpet)
The first thing to go was the old roman shade. Then, about 3 years later we said goodbye to the bright red carpet. That just left the pink fireplace and the red and black paneling. Honestly, the brick and paneling never really bothered me until my husband mentioned doing a DIY barnwood wall over the paneling. It lit a fire in me and I suddenly HATED the brick and paneling and it HAD. TO. GO. So, in a matter of days, the “red room” renovation began.
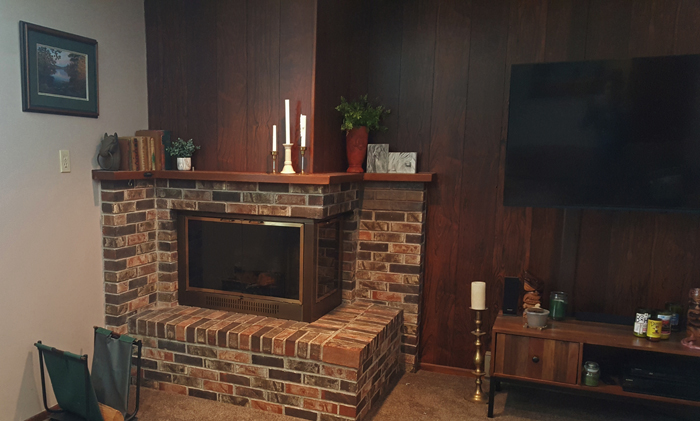
(Before Grey Washing the Brick Fireplace)
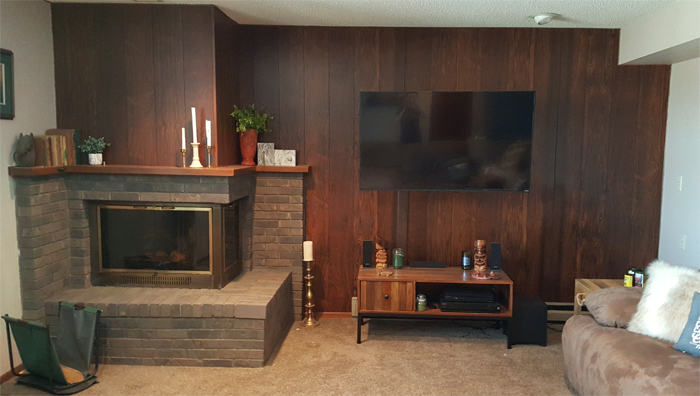
(After Grey Washing the Brick Fireplace – Before the DIY Barnwood Wall)
Choosing Wood for a Wood Accent Wall DIY Project
Since this was a DIY project and we wanted to keep the costs down, we were looking at using pallets or some other form of very cheap wood. I liked the idea of a reclaimed wood wall but putting old wood in our home was a bit unsettling. Rough edges, splinters, and bugs with a toddler are not the best idea. So we scratched the idea of an actual reclaimed wood wall in favor of new wood made to look old.
We found the cheapest wood possible ($2.25/ea) at the indoor lumber section at Menards. We went with the 1″x6″x8′ select pine boards because we had a large wall to cover and they would allow for short and long lengths.
We picked the “worst” looking boards we could find for our DIY barnwood wall, as long as they were not warped. We found raw edges, weird patterns, dents, dings, stamps, knots, anything that gave the new wood and old, rustic look.
Now, how to age wood to actually make it look naturally old?
How to Age Wood for a DIY Barnwood Wall
I tried a lot of store-bought stains and mixing them a million different ways looking for the perfect old reclaimed wood wall look. Turns out, no store-bought stain will give you the look of old wood. It’s just impossible. So, I started experimenting with different natural wood oxidation techniques I found online. Like magic, they make new wood look old!
In the end, I used 2 different homemade wood “stains” to give the wood wall variation in color. I thought this would look a bit more natural and interesting.
First, you’ll have to mix the satins.
Homemade Wood Stain Supplies
This is super easy, folks. You just need a few ingredients, some aggression, and some patients. The key is, the homemade wood stain needs time to mix so you have to make the “stain” a couple days in advance. In total, this wood accent wall DIY project took us about 3 days. Two prep days and one building day.
What you’ll need to make your DIY barnwood wall boards:
- Apple Cider Vinegar
- White Vinegar
- Steel Wool – Grade #0000
- Black Tea Bags
- 3 Foam brushes
- 3 large bowls – at least 2 of these will need to be thrown away when you’re done
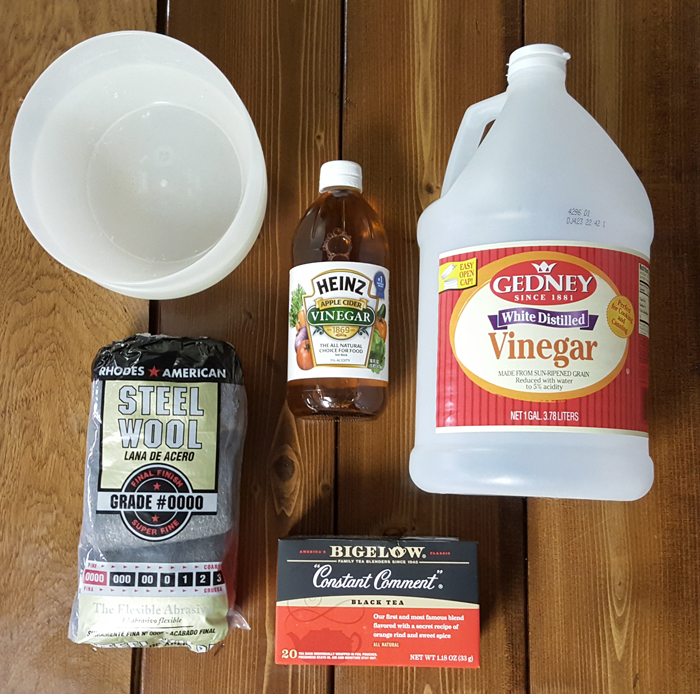
As I mentioned, I used 2 different recipes to get the variegated reclaimed wood wall look. One with a more grey tone and one with a more brown tone. You also need a base coat to make the magic happen.
Homemade Barnwood Base Coat: Black Tea
So, I have no idea why or how this works but it is a necessary step. I tested my homemade wood stains without it and basically, nothing happened to the wood. So, you MUST use this base coat to achieve the reclaimed wood wall look.
Step 1: Boil 3 cups of water
Step 2: Add 6+ black tea bags to the hot water
Step 3: Allow tea bags to steep until completely cool or longer
DIY Grey Toned Homemade Wood Stain: Apple Cider Vinegar + Steel Wool
Step 1: Pour apple cider vinegar into a large bowl (amount will depend on how much wood you need to stain. I used about 1.5 cups to do half my wood wall)
Step 2: Rip up 1-2 Steel wool pads and place them in the bowl with the vinegar.
Step 3: Stir it around a bit
Step 4: Wait 48 hours for the steel wool to meld with the vinegar.
*Some people say to cover the mixture, some say to shake it periodically, I didn’t do much other than impatiently check it to see what it had done.
DIY Brown Toned Homemade Wood Stain: White Vinegar + Steel Wool
The same steps as above but with white vinegar.
Step 1: White vinegar into a large bowl (again I used 1.5 cups for half my wall boards)
Step 2: Rip up 1-2 Steel wool pads and place them in the bowl with the vinegar.
Step 3: Stir it around a bit
Step 4: Wait 48 hours for the steel wool to meld with the vinegar.
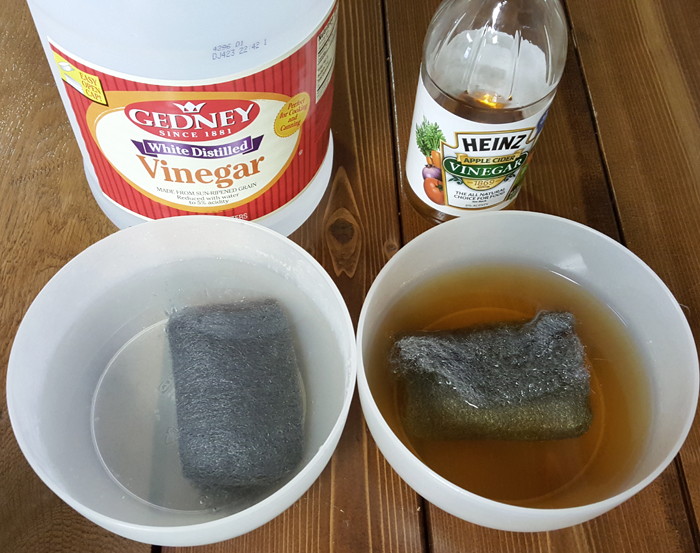
(I ripped up the steel wool after taking the photo)
Creating Barnwood Boards for the Wood Accent Wall DIY Project
Step 1: Distressing New Boards to Look Old
I distressed my wood boards even further by dinging them up with a wire brush, chain, hammer, nails, screws, and anything else I could think of. This makes marks where the homemade wood stain will settle, creating dark spots. Think gouges, scratches, wormholes, woodpecker holes, etc.
Just bang away in no particular pattern.
Step 2: Apply the Homemade Base Coat
Using a foam brush, paint on the black tea mixture. You’ll want to cover the entire front and edges of the board because the homemade stain only works when it reacts with the black tea base coat. Allow the base coat to dry.
**FACTUAL TIP: These first 2 steps can be done while you’re waiting for the homemade wood stain to meld for 48 hours.
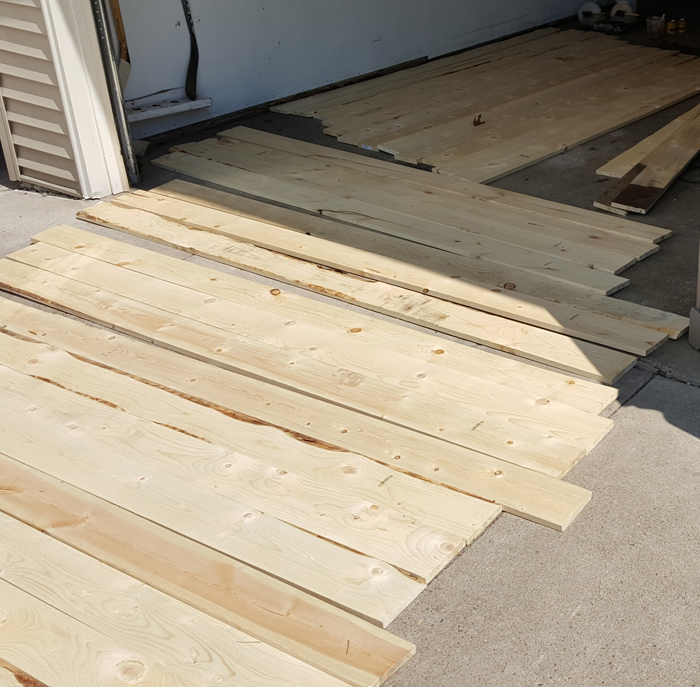
Step 3: Apply the Homemade Wood Stain
Since you’re using vinegar based stain, I recommend doing this step outside and letting the wood air out a bit before building the wall.
Using a foam brush for each of your stain colors, brush on the homemade stain to various boards. You should see a reaction almost immediately and the full color will appear within about 15 minutes.
I was very sporadic about which boards were grey toned and which were brown. I even used both stains on the same board to create some interesting colors where they touched and overlapped.
If you want some boards a bit darker you can apply more than one coat to some boards. Adding more stain to just part of a boarded ended up giving me water marks where the stain stopped. I really liked the effect of this because it added more “natural” interest.
Once you’re finished applying the stain, allow the wood to fully dry and touch up any areas you may have missed.
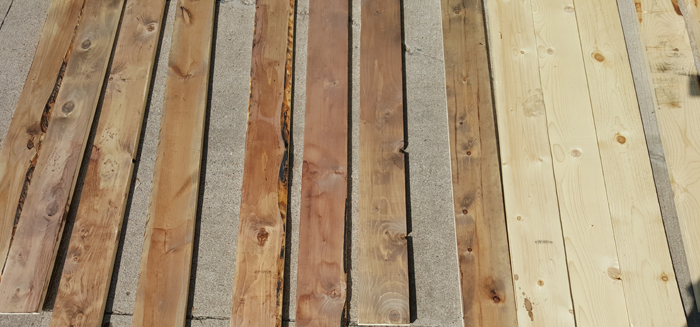
Done! You’ve got cheap and easy barnwood boards for your wood accent wall DIY project!
Now to build the wall…
Building a DIY Barnwood Wall
Things you’ll need for your wood accent wall DIY project:
- Wood boards – Stained, dry, and ready to hang
- Painters tape (or masking tape)
- Dark paint + brush (if not covering an already dark wall)
- Screws (or nails) – We choose to use black screws because it was rustic and easy. You could also use nails for a more discreet look
- Screwdriver/drill (or nail gun) – Again, we used screws so we used a drill/driver. We predrilled holes that were close to the ends of the boards so the screws wouldn’t split the boards. Screws located in the middle of the boards we did not pre-drill. If using nails I would recommend a nail gun just so you save your wrist, there are going to be a lot of nails to pound in!
- Tape Measure
- Square or level – The key to making straight cuts is a square or level.
- Pen
- Circular Saw (or miter saw) – A circular saw is one of our must-have tools! Eventually, I’d love to have a miter saw as well.
Now, let’s get started! There are a couple things you need to do to prep the wall you want to cover.
Step 1: Locate the Studs
Locate and mark your studs with painters tape on the ceiling and bottom of the wall so you know where to nail/screw your boards to secure them to the wall.
Step 2: Prep the Wall
Our wall had dark paneling on it so we skipped this step but if you are cover a light or bright colored wall, you’ll need to paint it black or dark brown so any gaps in the DIY barnwood wall are camouflaged.
Step 3: Start Hanging the Boards for your DIY Barnwood Wall
Choose your first board in the length you desire. Attach it to the wall with your screws or nails making sure to hit the stud. We didn’t put a screw at every stud, just one at each end and then 1-2 in the middle. The longer the board the more screws we put in the middle to keep it flat and secure on the wall.
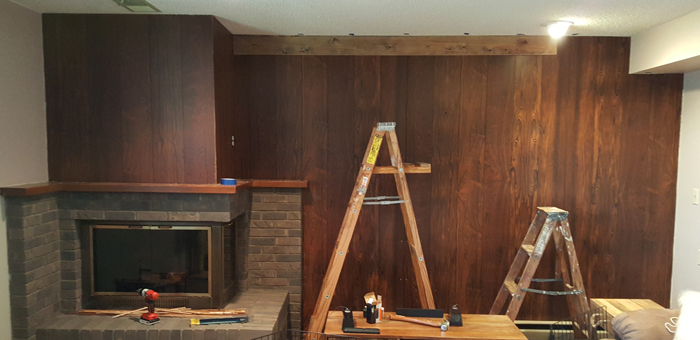
Step 4: Fill in with Boards as You Go
Measure the space to fill on the wall and mark the appropriate length on your board. Use the level (connecting 2 measurement marks) or a square to draw a straight line. Cut the board using your saw. Dry fit the board in your space to make sure it fits. Screw or nail in place!
Continue on starting with various lengths, board colors, and board designs but don’t over think it. It should look sporadic and rustic. Ideally, you don’t want a pattern or 2 seams to line up.
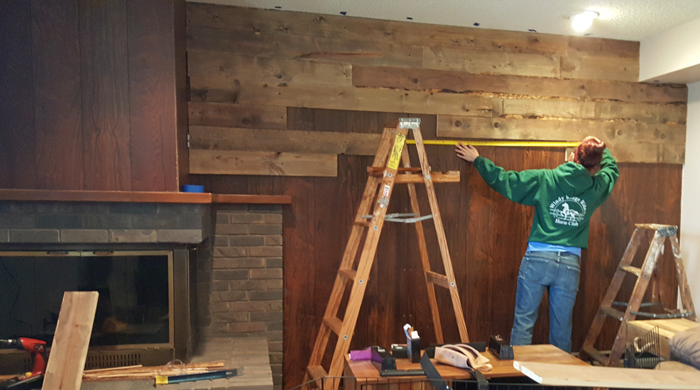
Step 5: Placing the Bottom Boards
Our bottom board space for our DIY barnwood wall ended up being about 4″ wide. Rather than ripping down a 6″ wide board with a circular saw (which is dangerous and I do not recommend it), we bought a 4″ wide board and stained it. If you have a table saw you could safely rip a wider board to fit. Unfortunately, we don’t have one… yet.
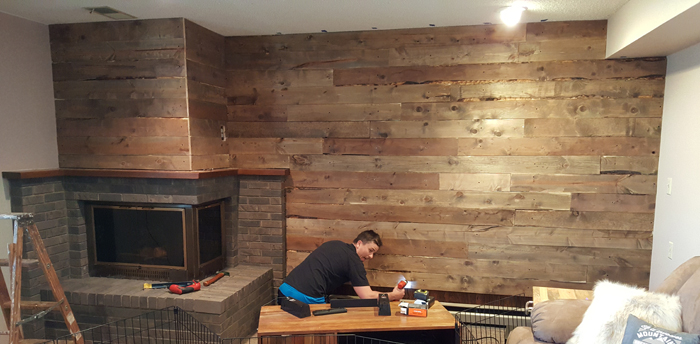
TADA! Your Wood Accent Wall DIY Project is Complete!
Notice all my DIY projects end with tada?! It’s just such a satisfying wonderful feeling to complete something on your own! This room is no longer known as the “red room,” it’s now the “movie room!” Woop woop!
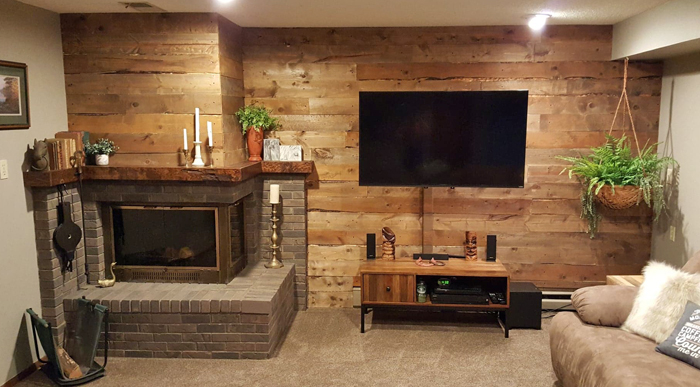
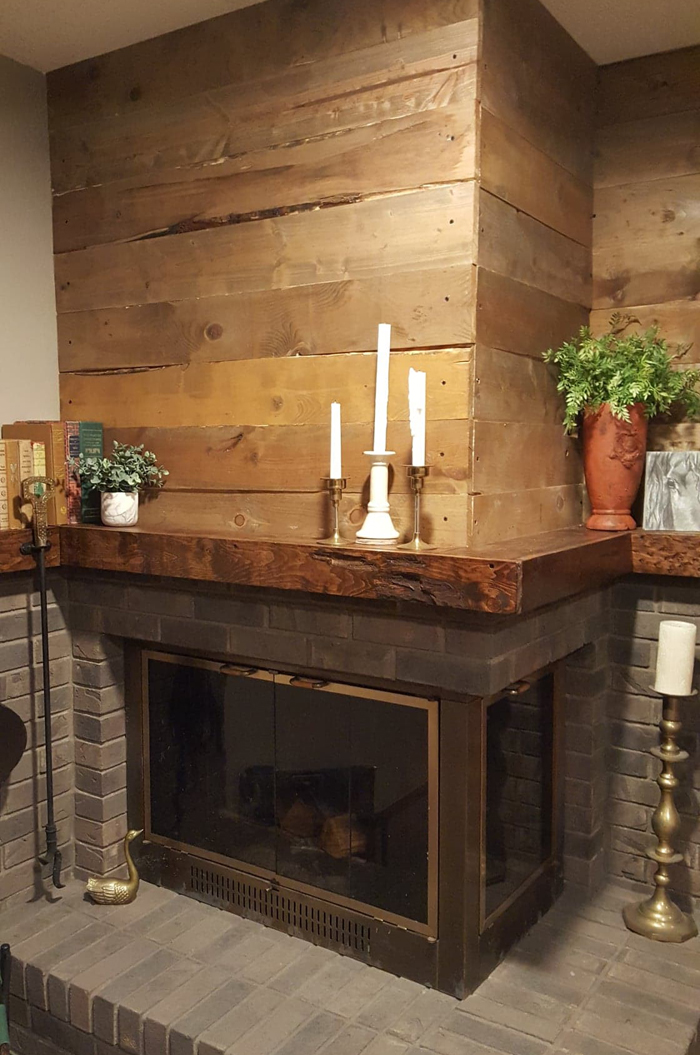

How did your DIY barnwood wall turn out?
Let me know in the comments below! You can also send a photo of your wood accent wall DIY project to [email protected]. I’d love to see them and share your handiwork with other readers!
Until next time, happy DIYing!
XO,
Meg


I can’t tell you how incredibly impressed I am!!! Very well written and the wall looks GORGEOUS!!!!! Nice work guys!
Thanks, Amanda! Appreciate you stopping by!