Once I get an idea in my head, it’s basically do or die. At times it can definitely be a negative personality trait since I have a hard time finding exactly what I’m looking for. Baby mobiles are one of those instances. I’m not a big fan of the plastic store bought ones that attach to the crib so I was looking for something a bit more unique. Handmade baby mobiles tend to be pretty expensive on Etsy but they are really not that difficult to make. To get what I wanted without breaking the bank, I decided a DIY baby mobile was my best bet! Here’s how to make a mobile of your own. It will work with any design really, mine just happens to be a DIY bird mobile to match our baby and toddler bird bedroom decor!
DIY Baby Mobile | How to Make a DIY Bird Mobile
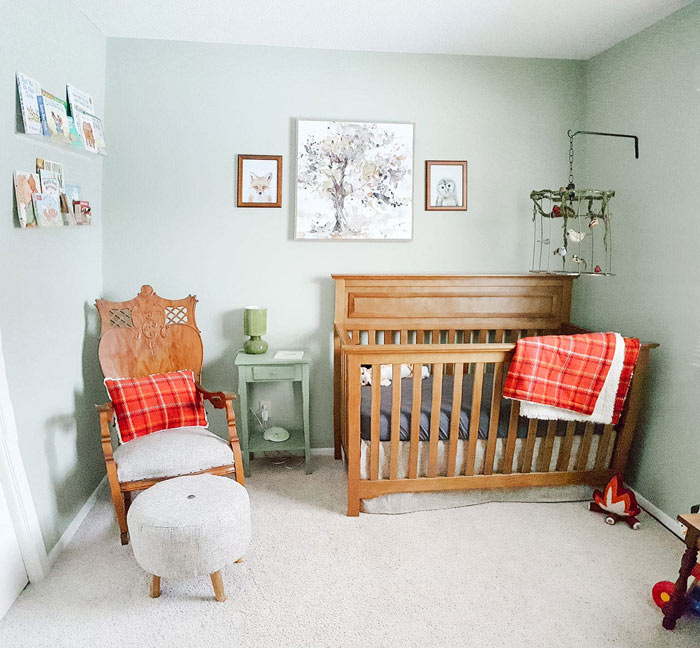
The first mobile I made started with inspiration from an antique lampshade frame my mom had saved. It’s a super unique shape, perfect for mimicking a birdcage. I hung a variety of birds from the inside of the lampshade and added some moss to soften the frame a bit. Our son absolutely loves it. Every time he goes to bed he says “bird” with a giant smile on his face and points to it.
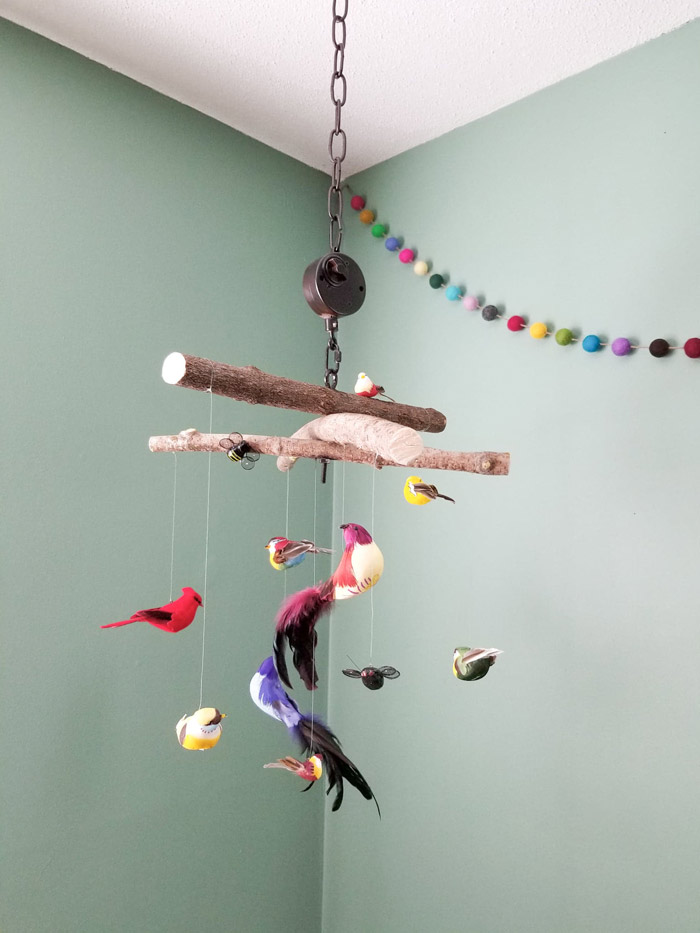
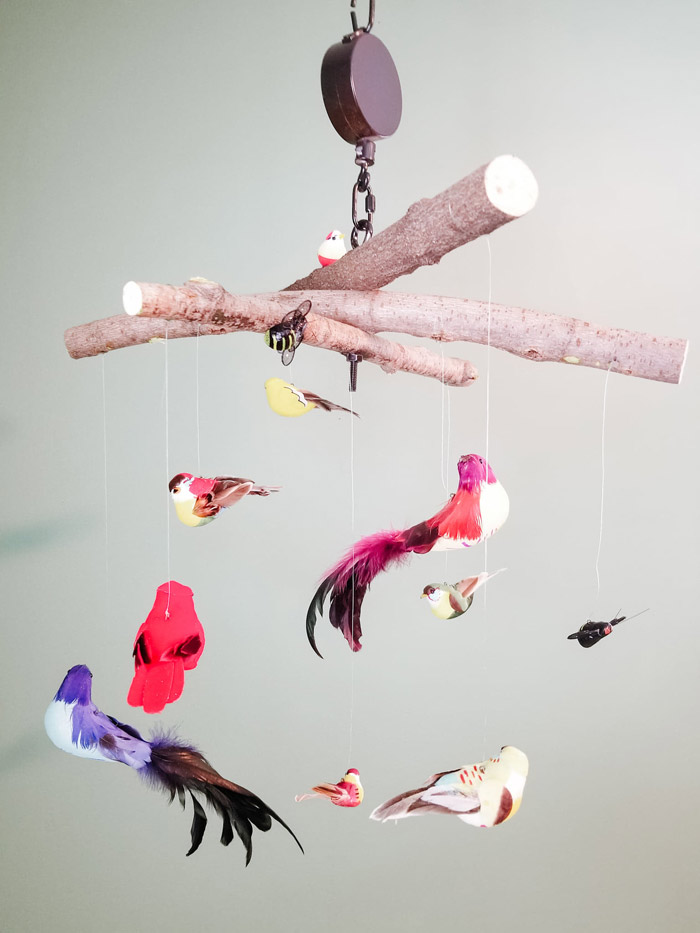
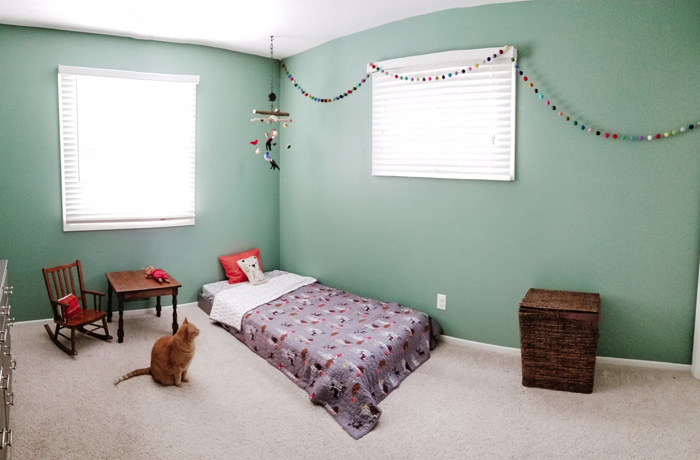
With this in mind, when we found out we were adding another little boy to our family, I decided to make a second DIY bird mobile for our son’s toddler room. He’ll still be only 2.5 years when he moves, so a mobile will still be beneficial for bedtime. Since I only had one antique lampshade frame, I needed a different base for the second DIY baby mobile. I decided on branches to keep the bird theme but make it a bit more rustic.
Other than the difference in the frame, the steps for how to make a baby mobile are the same. That means, no matter what theme you are going for, these steps should work for you.

How to Make A Baby Mobile: DIY Bird Mobile
Before I decided on the bird theme, I also found several great baby mobile decor options that would make a simple DIY baby mobile. The sky is really the limit when it comes to options for how to make a baby mobile. A few things to keep in mind:
- A variety of color and texture will be more interesting for baby (and the decor!)
- Movement and song is often key to falling asleep
- Your baby will be looking up from the bottom so make sure it’s interesting from all angles
- This is homemade so not tested by baby gear manufacturers, make sure everything is secure and that the mobile is out of baby’s reach.
Supplies for Your DIY Baby Mobile
*Remember, you are building this DIY baby mobile at your own risk. Factual Fairytale is not responsible for any injury, damage, etc. resulting from following these how to make a baby mobile instructions or from making your own baby mobile.
Frame/ Base for Mobile: For mine, I used a lampshade frame for one and tree branches for the other. Depending on the style of your frame, you may need some additional supplies. For the branches, I also needed these items:
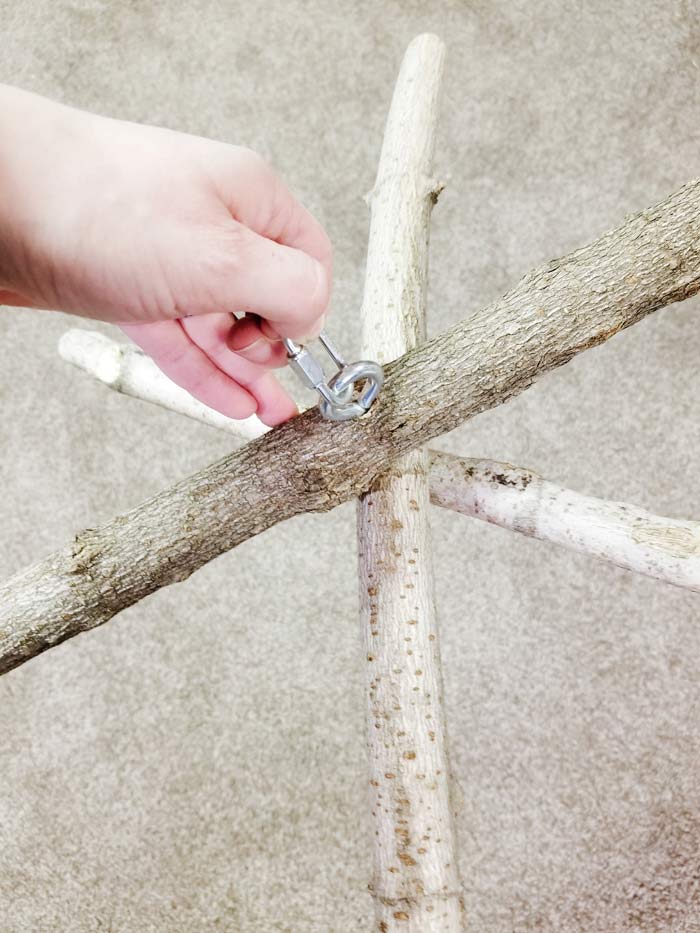
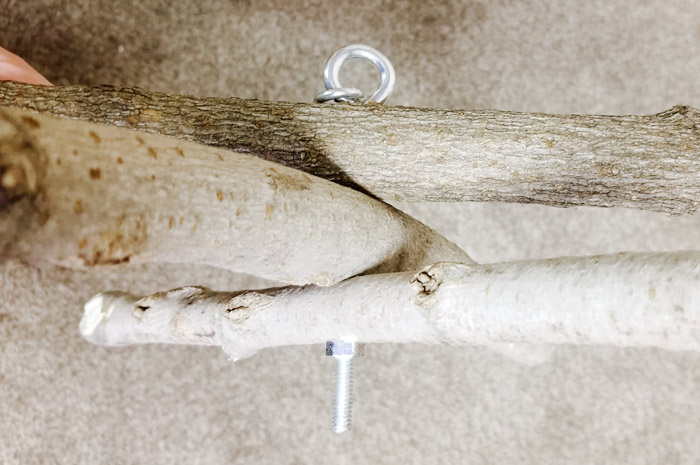
- Eye Bolt+ nut: For the branch version, I also needed an eye bolt and nut to connect the 3 branches together.
- Quick link or Small Clip: I needed a 5″ long eye bolt for the size of my branches. The only diameter I could find was thicker than the opening on the hook on the motor/music box for the mobile. I used a small quick link to connect the eye bolt to the mobile motor/music box.
- Drill: to connect the 3 branches I needed to drill a hole in them, depending on your frame material, you may or may not need a drill.
Mobile Motor/Music Box: I choose this mobile motor which comes in a variety of songs. Our song is Brahms Lullaby and our son loves it.
Chain: You will need a chain to hang the mobile from the ceiling or wall hook and possibly to connect your mobile to the motor. I used light fixture chain.
Ceiling Hook or Long Wall Hook: I used one of each, the long plant wall hook with wall anchors in the nursery and a ceiling hook in the toddler room. Make sure to use wall anchors or a heavy ceiling anchor. I used wall anchors rated up to 50lbs and a ceiling anchor rated up to 30lbs. Both mobiles are much lighter than that but better safe than sorry.
Fishing Line (or string): You will need some type of string, jute, rope, or fishing line to hang your decorations from the frame. I used clear fishing line for my design.
Decorations: I used a variety of birds for both DIY bird mobiles. I also mixed in some bumble bees, a birds nest, and moss ribbon. You can really use anything you want! Because my birds and bees didn’t have anywhere to attach a string, I also needed these supplies:
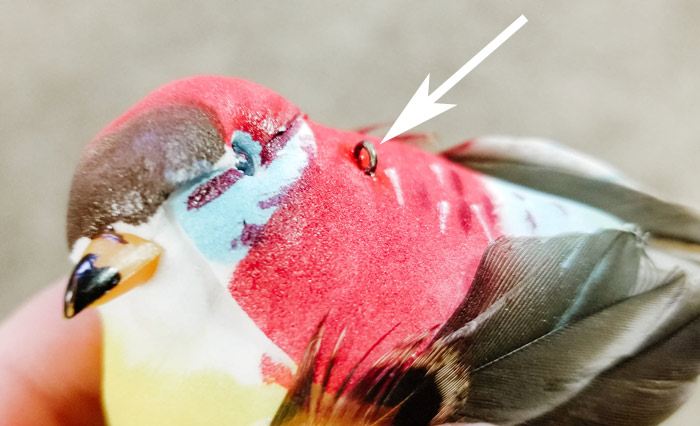
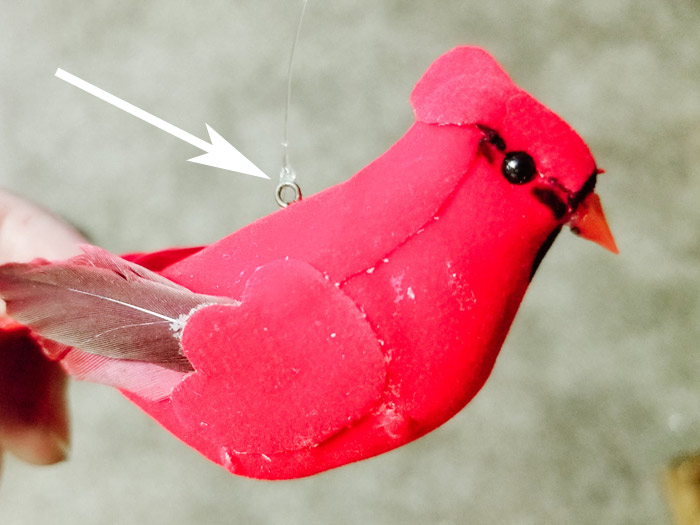
- Eye Pins: For the birds, I needed to create a way to hang them from the fishing line. I used eye pins to create a loop on their back.
Super Glue/Hot Glue: I used super glue to secure the fishing line on the frame and to reinforce the knots. I also use it to attach the eye pins to the birds. I used hot glue to secure the various decor to the frame. You can use one or the other or both.
Spray Paint (Optional): I choose to spray paint the mobile motor because white didn’t fit the style of our DIY baby mobile. I also painted the metal hardware to match the brown chain.
How to Make a Baby Mobile, Step by Step
PREP:
Paint: Before you begin creating the mobile, do any necessary prep. I spray painted the metal hardware and the mobile motor dark brown to match the rest of the bird bedroom decor.
Add Eye Pins: To add the eye pins to the hanging decor, push the pin into the back (or top) or the decoration depending on how you want it to hang. Remove the pin, add a dot of super glue, and push the pin back into the decor. Continue doing this for each hanging item for the mobile. If I were using a soft, plush piece I would have sewn a little loop onto the top of the decor item.
Tie Fishing Line to Decor: Once the eye pins are dry, tie the end of a piece of fishing line or string to the pin on the decor. Leave a long piece of fishing line hanging from the decor (I left about 15″).
STEP 1: Build the Frame or Base for Your DIY Baby Mobile
The first step is determining your frame/base for the DIY baby mobile. For my first mobile, this just meant cleaning up the lampshade frame and making sure there were no rough edges or loose bits.
For my second mobile, I had to connect 3 pieces of wood. We used branches cut from our back yard in varying thicknesses and textures. You could just as easily use wooden dowels or any other stable craft material. Think embroidery hoops, metal craft rings, PVC pipe, copper pipe, etc.
How to Make a Baby Mobile Frame from Branches
Prior to assembly, I sanded the cut edges of the branch and made sure there were no loose bits. The easiest way to connect the branches together is to drill a hole through the middle of each and use an eye bolt and nut to hold them together. This also provides a way to hang the mobile from the motor.
STEP 2: Connect the DIY Baby Mobile Frame to the Motor and Chain.
Using the hook you added to the branches and a quick link or small clip if needed, hang the mobile from the spinning hook on the mobile motor.
Next, spread open the last chain link on your fixture chain and loop the top ring of the motor through the open chain link. Close the chain link again to keep the mobile securely in place on the chain.
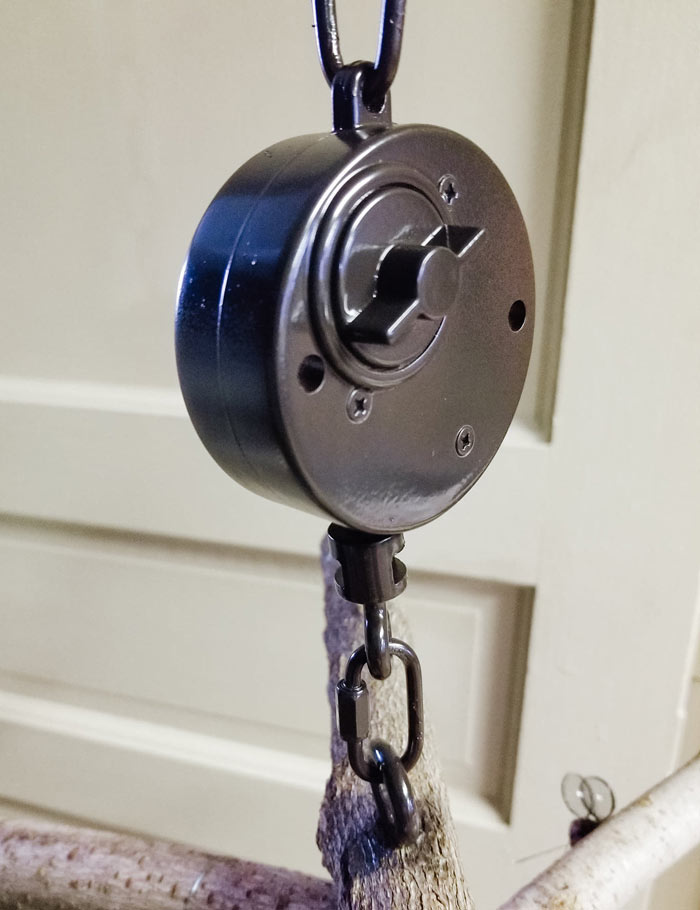
STEP 3: Hang Decorations from DIY Bird Mobile Frame
It’s easiest to work on the mobile while it’s hanging if possible. I hung mine from a small nail in the top of a door frame. This allows you to get a good look at the mobile while you are working on it.
Select a piece of hanging decor (birds) and tie it randomly to the mobile frame. Continue tying the hanging decor at random lengths and places along the frame. Make sure to spread out the various sizes, textures, and colors for maximum interest.
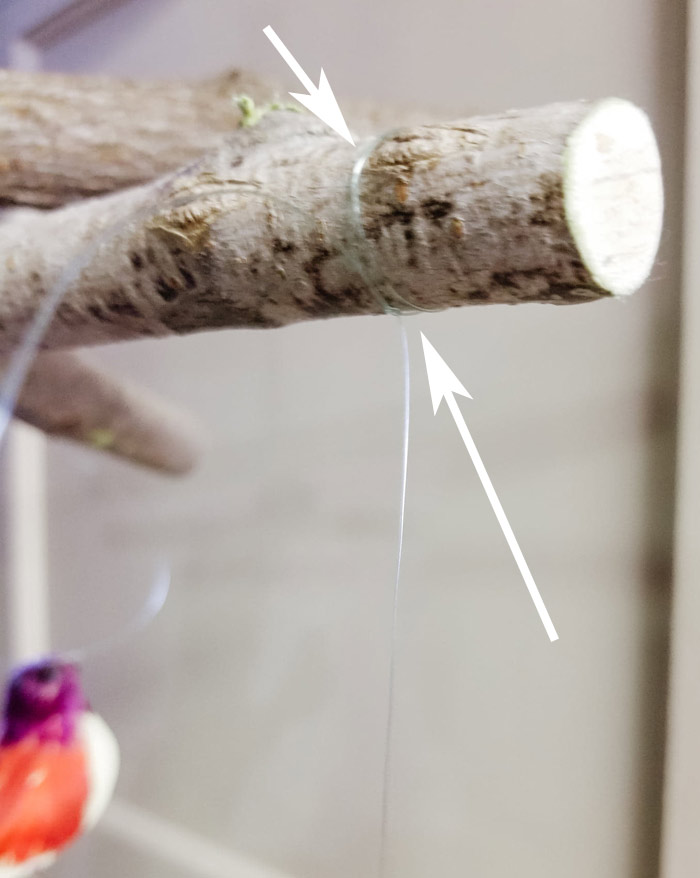
STEP 4: Glue Decor in Place
Add any non-hanging decor to the frame. For my lampshade DIY bird mobile, that meant adding the bird’s nest, sitting bird, and moss ribbon to the frame with hot glue.
For the Branch DIY bird mobile, I added the sitting bird and the sitting bumble bee with hot glue.
Make sure everything looks good, trim any excess string, and secure the knots and strings/fishing line on the frame with glue (I used super glue). This will ensure the knots don’t come loose and stop the strings from moving around on the frame.
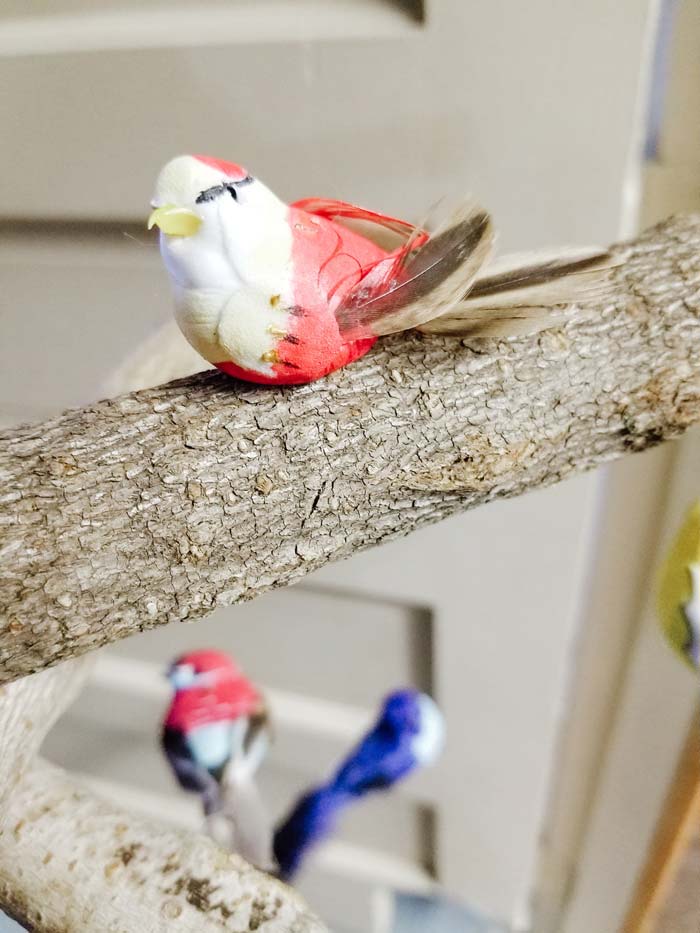
STEP 5: Hang DIY Baby Mobile from Ceiling or Wall Hook
Wall Hook: For the lampshade DIY bird mobile, I used a long plant wall hook and heavy duty wall anchors to hang it. Position the hook on the wall and follow the wall anchor package directions for hanging. Shorten the fixture chain as needed and hang the mobile from the wall hook.
Ceiling Hook: For the Branch DIY baby mobile, I used a light fixture ceiling hook. These use a spring anchor inside the ceiling to hold the hook and mobile. Position the hook on the ceiling and follow the package directions. Again, shorten the fixture chain to the proper length so it’s visible but the child won’t be able to reach it.
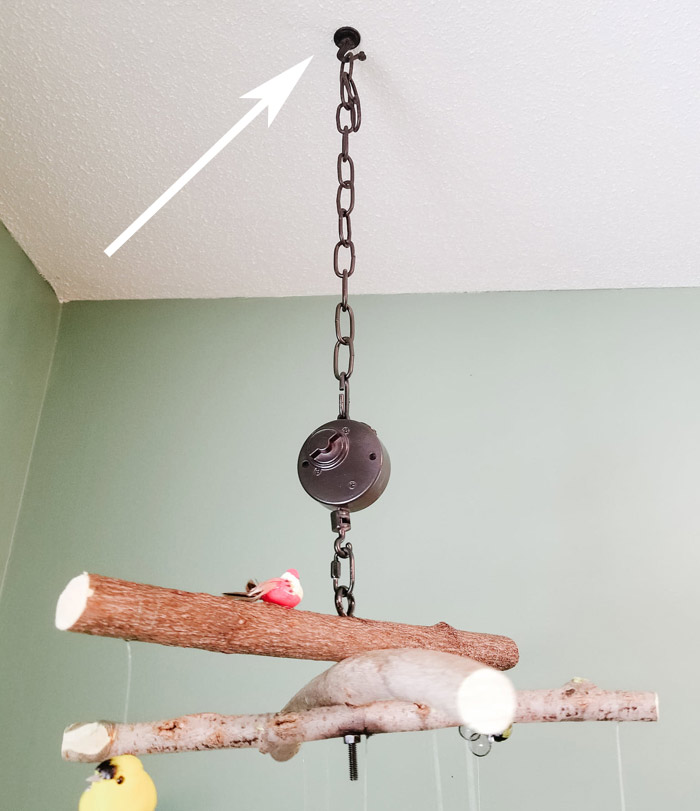
DIY Bird Mobile Finished Product!!
Give the motor a twist and test out your handy work! It’s as easy as that, just maybe a bit time consuming depending on the number of knots you’re tying haha!
How did your DIY Baby Mobile (or DIY Bird Mobile) turn out?
Share your theme, tips, and tricks in the comments below! You can send your photos to [email protected] and I’ll share them with the other readers! Can’t wait to see your finished products!
Until next time, happy DIYing!
XO,
Meg
