I’m not going to lie, we have baby gates all over our house. It’s the only way we can get things done with a young toddler running around. In some rooms of the house, we could just shut the door but we have pets we don’t want to stop from coming and going. It got to the point where I was sick of having ugly pressure gates all over the house that were a pain to put up and down all the time. I was looking for a decorative baby gate option but everything was pricey and really not that cute. Then I came up with this genius hack for turning a vintage headboard into a DIY baby gate. Here’s how I did it – spoiler alert, it’s SUPER easy!
Decorative DIY Baby Gate from Vintage Wood Headboard
You don’t really realize it but toddlers are toddlers for a long time. The walking and exploring but not understanding (or listening :/) phase is long. For us, that means utilizing baby gates for safety and sanity. We have a DIY barndoor baby gate at the top of the stairs. Plus, a cheap one on the downstairs playroom/living room doorway so the cats can still get in and out but the little monster can run away.
We also have 2 in our kitchen to block off the rest of the upstairs so we can easily cook and clean with him in sight. This was especially important before we took down the wall in our kitchen because we couldn’t see him playing in the living room. Since the 2 in the kitchen were used often and were very prominent in the house I decided those were the gates that needed to be updated.
Homemade Wooden Swing Baby Gate
I started looking for a cute vintage headboard and footboard set on craigslist and Facebook marketplace and it wasn’t long before I had several great options. I ended up going with a wooden set that would allow me to screw into it (opposed to metal). The total price was $25 making them $12.50 each plus the minimal supplies I would need. A total bargain compared to premade baby gates!
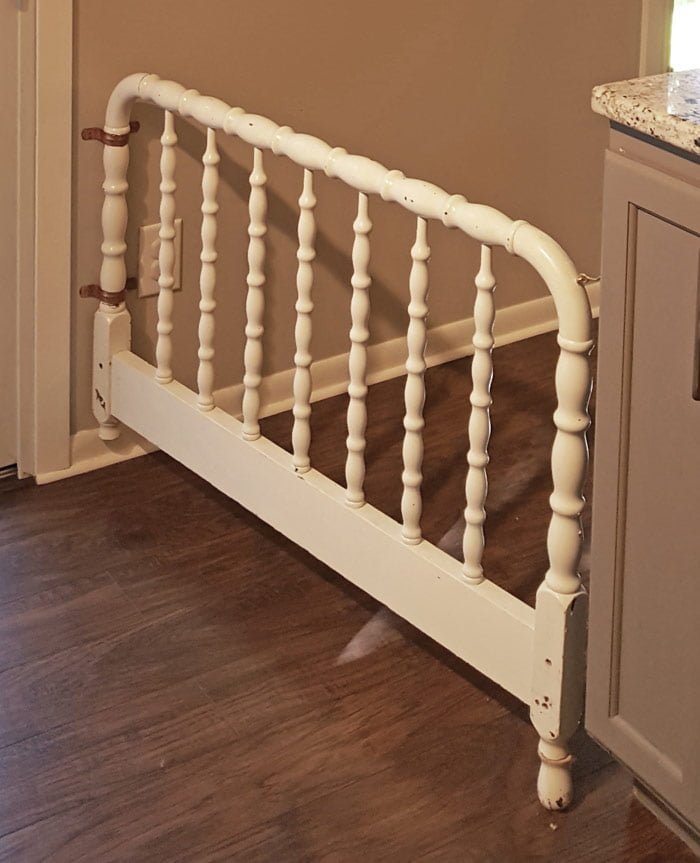
Supplies for DIY Baby Gate from Vintage Headboard
Headboard – Plus matching footboard if needed
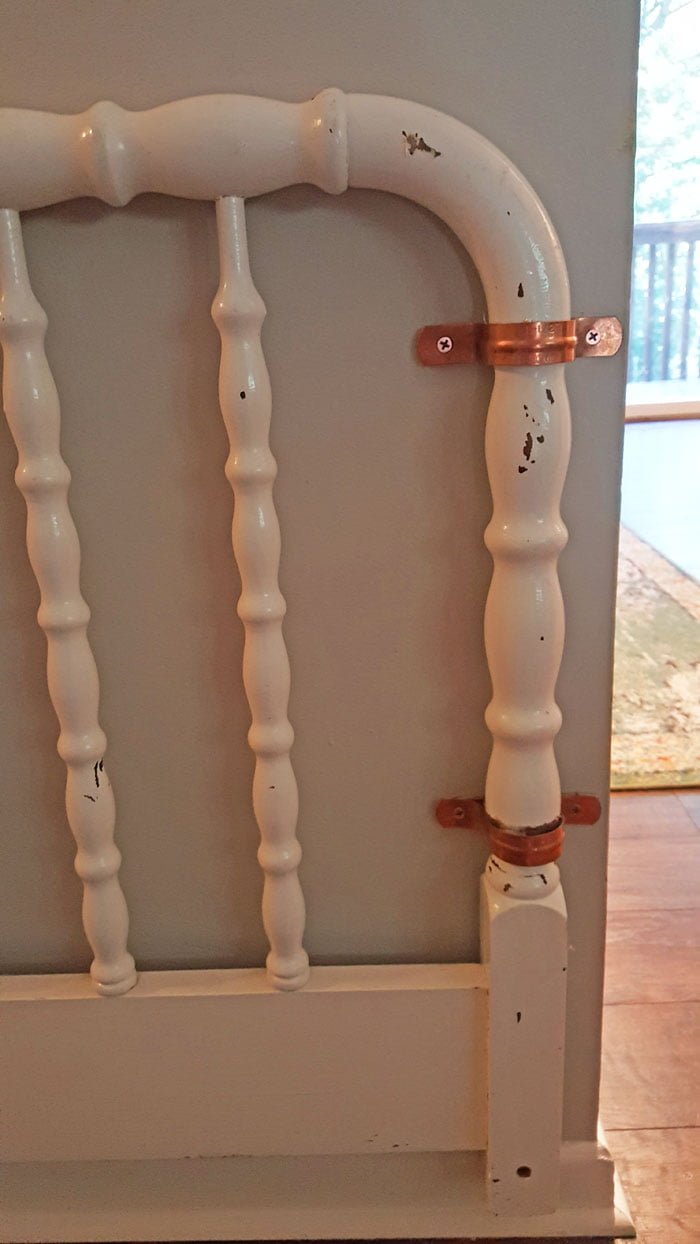
2 Tube Straps – You need 2 tube straps per gate for mounting. I used Copper plated to match our kitchen hardware. You could also spray paint them. Choose a size slightly larger than the outside rung of the headboard. I bought 2 sizes and returned the ones I didn’t use.
4 Screws – Drywall or wood screws for securing the tube straps. I used gold screws to blend in with the copper and you can’t tell. Again you could spray paint them.
1 Hook and Eye Latch – For a wooden swing baby gate you can use a hook and eye latch to close the gate. If you have a metal headboard you may need to get a bit more creative since screwing into it would be tough.
Saw (optional) – You may need to shorten the legs of the headboard/footboard so they are closer to the ground. I had to shorten both. I just used a hacksaw to quickly shorten them.
Drill – You’ll probably need to drill holes in the headboard for the hook and eye latch and possibly the mounting surface.
Screwdriver – For mounting the tube strap with screws.
How to Make a Baby Gate from a Vintage Headboard
*It’s important to note, these should not be used for safety gates or near stairs. They should be used simply for closing off a room. Also, make sure to measure the slats and the bottom gap of the DIY baby gate to make sure they are not too wide where Baby might get stuck or slip through. Factual Fairytale is not liable for any accidents happening due to the creation or use of a DIY baby gate.
With that said, here’s how to make a baby gate from a vintage headboard.
Step 1: Adjust the Length of the Legs of the Headboard
Our headboard was way too tall and the footboard was slightly too tall as well. I ended up cutting off the legs entirely and realized after that the DIY baby gate needed the support. I had to screw a portion of the legs back on to stabilize the gate and take the pressure off the “hinges.” This is a do as I say, not as I do step.
The best thing to do would be to leave both legs intact, just adjust the height so it clears your baseboard (if they are in the way) and is the proper height so your child can’t fit under it or climb over it (and ideally, you can step over it). Ideally, sand the cut edges and add a furniture pad to the bottom of the legs so they slide easily.

Step 2: Mount the Wooden Swing Baby Gate
Using 2 tube straps, attach the homemade baby gate to the wall near the top and the bottom. Make sure it can rotate smoothly. If it does not, use a larger size tube strap.
Our headboard and footboard have square bottoms which meant we had to have a larger tube strap for a looser fit so the square could rotate without gouging the wall.
Step 3: Add Latch to Decorative Baby Gate
Determine the location of your hook and eye latch. Drill a hole in your decorative baby gate slightly smaller than your hook screw diameter. Screw in the hook.
Line up the hook on the wall where the eye will go. Mark the location for the eye and drill another hole slightly smaller than the diameter of the eye screw. Screw in the eye.
Test the latch. Ideally, the hook in the eye should be tight enough to stop a toddler from easily unlatching it.
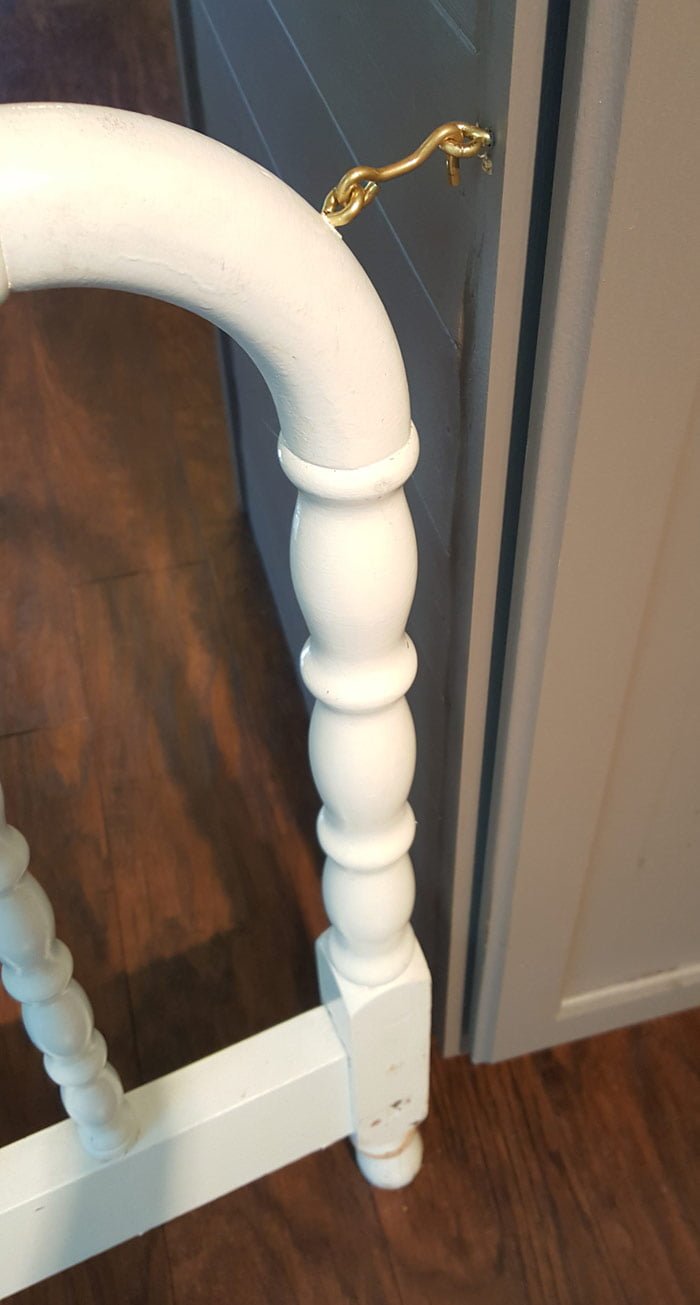
That’s it! You’ve got a Decorative Baby Gate from a Vintage Headboard!
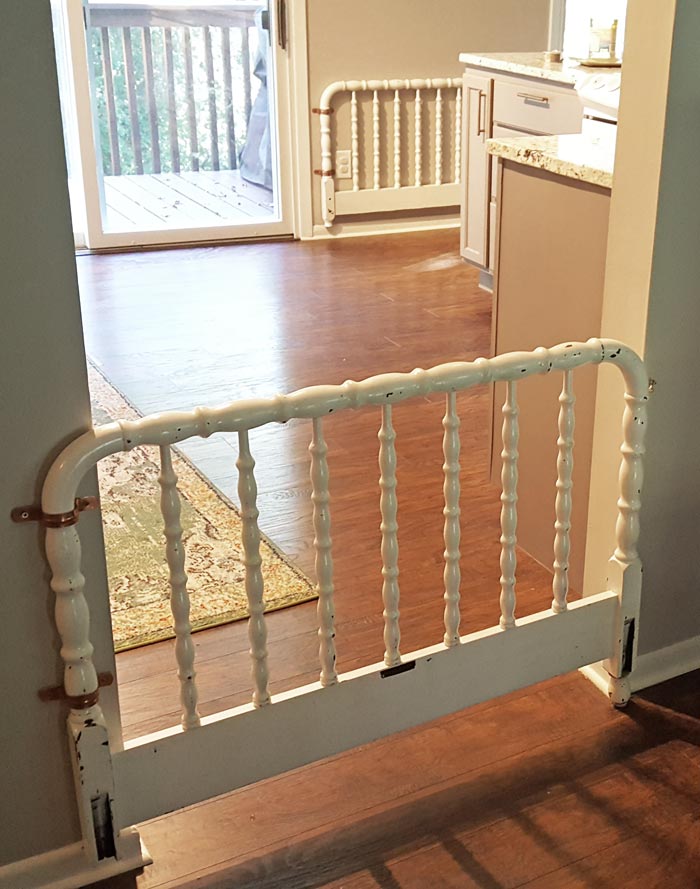
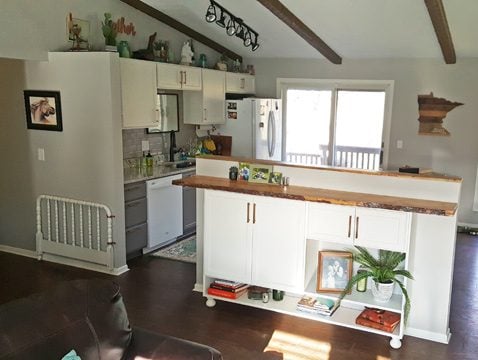
How did your DIY baby gate turn out? Send your photos to [email protected]!
Until next time,
XO,
Meg
